This seal is located between the spray arm and the water feed tube.
How Buying OEM Parts Can Save You Time and Money
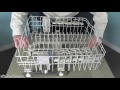
Part Videos
Replacing your KitchenAid Dishwasher Spray Arm Seal
Troubleshooting
This part fixes the following symptoms:
Not cleaning dishes properly | Leaking | Noisy
This part works with the following products:
Dishwasher.
This part works with the following products:
KitchenAid, Kenmore, Whirlpool, Maytag.
Part# WP8268433 replaces these:
AP6012237, 8268433
Customer Reviews
Average Rating:
★★★★★
★★★★★
7 Reviews
4.1
Filter By Rating:
5 Stars
4
4 Stars
2
3 Stars
0
2 Stars
0
1 Star
1
< Prev
1
Next >
Sort by:
Search filter:
Clear Filter
Your search term must have 3 or more characters.
Keep searches simple. Use keywords, e.g. "leaking", "pump", "broken" or "fit".
Sorry, we couldn't find any existing reviews that matched. Try using some different or simpler keywords.
★★★★★
★★★★★
Clinton B - August 20, 2022
Verified Purchase
Easy repair & worth a try, but problem turned out to be more extensive than anticipated
Part was as advertised and delivery was excellent, but unfortunately didn't completely cure the problem.
★★★★★
★★★★★
Adrian F - January 29, 2022
Verified Purchase
Saved me a new dishwasher
My dishwahser was no longer cleaning dishes well. I replaced this and the equivalent seal for the lower arm. The whole repair took about 30 minutes. The dishes come clean now. I was getting ready to spend 1500 to 2000 on a new dishwasher. No need anymore, the current one works well.
★★★★★
★★★★★
Doug P - July 18, 2020
Verified Purchase
Wrong diagnosis
The part was right but we discovered it was not the problem Bottom line is we need to buy a new dishwasher. Thanks for your help.
★★★★★
★★★★★
John Z - January 14, 2020
Verified Purchase
Easy repair - dishwasher working well again
Was happy to find this part online, as well as the instructions on how to replace it. Delivery was very fast - had the piece within a couple of days, delivered direct to my home. Pricing for the piece, as well as the delivery charge, was very reasonable. My dishwasher is now cleaning the dishes properly, just like when it was brand new. I am pleased with the results.
★★★★★
★★★★★
CHRIS E - March 5, 2019
Verified Purchase
Worked as expected
Arrived in a few days.easy replacement
★★★★★
★★★★★
Michel F - November 1, 2018
Verified Purchase
Great
Thank you
★★★★★
★★★★★
Marie-Véronique B - August 8, 2018
Verified Purchase
wrong part
I thought the part I had in my dishwasher was broken, but realized the new part I received is made the same way. My diswasher still doesn't clean as I did not replace the part. How can I return the new one?
August 9, 2018
Hello Marie-Véronique, we have sent you an email in regards to returning this order. Thank you for your review.
< Prev
1
Next >
Customer Repair Stories
Average Repair Rating: 3.3 / 5.0, 11 reviews.
What's this?
< Prev
1
2
Next >
Sort by:
Search filter:
Clear Filter
Your search term must have 3 or more characters.
Keep searches simple. Use keywords, e.g. "leaking", "pump", "broken" or "fit".
Sorry, we couldn't find any existing installation instruction that matched.
Glasses in the top shelf had food bits - not rinsing well
The most difficult part of this was figuring out the problem was with the middle spray arm - that it was not spinning (and thus not rinsing the top dishes). I could spin it by hand fine - but if I watched its position while the machine was running (open/close the door) I saw it wasn't moving. I took out the top shelf (with spray arm attached) and connected it to the garden hose. I could see then that the arm was sagging and hitting the rear connection, preventing it from spinning. To replace I removed the plugs from the top shelf side-rails (bend the rail open with your thumb and tip the plugs out of the rail to the right for the left rail, to the left for the right rail. this is easier than pulling them out the end of the rail). Slide out the top shelf. Turn over, remove the phillips screw and pull off the manifold, and middle spray arm. Replace with the new parts. I also replaced the top spray arm (which was very loose, and probably not spraying well because it was so loose). For this I unclipped the top feed tube and pulled off the old sprayer. Put a towel in the bottom rack of the washer so you don't drop the little pieces into the pump below. The top spray arm simply snaps in with the two connectors (the pointy one attaches through the feed tube).
removed parts and the ordered the parts. It was very easy to order parts from Partselect. I unscrewed a few screws and the disassembly was a breeze. I then revresed my steps and the new parts were instlalled no problem. Now on the the motor replacement. Thanks Partselect.com
spray arm did n't move because it had a crack in the end
First I had to remove the upper dish rack from the dishwasher. This was the most difficult part of the entire fix. I found the screw which holds the spray arm in place, Removed it and took off the old spray arm. Then I replaced the seal and put the entire thing back together, put the screw back in and replaced the rack. Then I ran a load of dishes and discovered the machine works just fine now.
Remove upper tray and spray arm. Remove two screws retaining pipe for upper spray arm and overhead. Unscrew retainer on top of lower spray arm and remove. Gently rotate the upper feed pipe clockwise until pipe can be removed from lower pipe. You may then remove the lower pipe and bearing housing where the seal is. Reverse order for reassembly. I also replaced upper spray arm bushing. Very simple, remove one screw and the arm will come out.
Had trouble finding my model dishwasher so i called Part Select and we were able to identify the same parts from a newer model. Repair was to replace the entire spray arm assembly, it went well with no problems.
Not cleaning well, Top spray arm not spinning. Chopper not turning
Disconnected power to dishwasher. Removed water supply hose from inlet water valve. Removed lower and upper racks. Removed Lower spray arm. Removed tube from pump tp top spinner. Pulled dishwasher from under cabinet (remember to tip to get back out!). Placed dishwasher on its back. Removed electrical connectors from water valve, main motor and drain motor. Removed drain hose from drain pump. Removed pump/motor assy by pulling out wedges and pushing assembly into dishwasher. Removed pump/motor assy from inside dishwasher. Cleaned out pump. Installed new chopper. Re-install pump/motor assy. Re-install driain pump hose. Re-connect the pumps and water valve electric connectors. Slide dishwasher near cabinet for re-install. Re-connect drain hose to dishwasher. Re-install dishwasher under cabinet.Reconnect water supply. Removed top spinner from tube. Installed new spinner onto tube. Re-install tube onto main pump (below lower spray arm). Clean out and re-install lower spray arm. Remove middle spray arm from top rack. Clean out spray arm. Re-install spray arm with a new gasket (gasket may have not been needed). Re-installed lower and top racks. Re-connect power supply. Position all three spray arms pointing towards the door to confirm they were turning. Tested dishwasher - confirmed fill, wash, and drain properly. Also confirmed that all three spray arms were turning. Machine is washing, draining and running great since!
At the time I ordered the feed tube assembly with spinner and the spray arm seal for the middle wash arm, the problem was dishes not getting clean on the top rack. Two weeks later the dishes were not getting clean on the bottom rack as well as the top rack, and liquid dishwasher detergent was left
I followed the PartSelect video to replace the feed tube assembly with spinner and the spray arm seal for the middle wash arm. Washing performance was better, but a couple weeks later the dishes on the bottom rack suddenly stopped getting clean. I decided I probably needed a new chopper assembly, which is identified by PartSelect as the cause of problem for 48% of the cases of dishes not getting clean. Before ordering the chopper assembly, however, I followed the video about how to replace the chopper assembly to determine whether the chopper assembly seemed to be worn out (the video shown at https://www.partselect.com/PS11722146-Whirlpool-W10083957V-Chopper-Assembly.htm). It was worse than I anticipated. I found the holes of the chopper assembly screen blocked by food, and the spinner in front of the screen had broken apart. In addition to finding the pieces of the broken chopper assembly, I discovered a treasure chest of debris, including about 8 pieces of broken glassware, 3 twister ties, a half-inch button, a 3/4-inch screw, and dozens of small pieces of metal. I poured water into the area and used a kitchen baster to suck out the water with all the pieces of debris, finishing the clean-up with paper towels. I ordered a new chopper assembly to replace the broken one, and the part arrived in under 48 hours. I relied on the same video to install the new chopper assembly. The only tricky challenge was getting the new chopper assembly back into place. I first tried needle nose pliers in two sizes, as recommended in the video, but what worked much better for me was using two chop sticks that were each about 1/4 inch square from top to bottom. Needle nose pliers are slanted, but the chopsticks did not vary in thickness and separated the screen from the spinner an even distance apart, making it easier to get the gear shaft on the chopper assembly to align in a straight line with the gear shaft on the pump motor. I also rotated the two gear shafts so the gears of the chopper assembly would mesh correctly with the gears of the pump motor shaft. The video cannot show that step very well because the man's hand blocks vision of how exactly to fit the chopper assembly into place. The video also fails to warn about possible debris around the chopper assembly and to explain how to clean out the debris. After finishing installing the chopper assembly my 14-year-old dishwasher cleaned my dishes as well as a new dishwasher. I spent a total of $110.24 on parts and shipping and invested a couple of hours total. The alternative would have been to spend $800 on a new dishwasher or wash dishes by hand. I am very, very happy with the outcome.
removed rack removed one screw removed old seal installed new seal installed screw
Other Parts Used:
Geoff from Avon, CT
Difficulty Level:
Really Easy
Total Repair Time:
30 - 60 mins
Tools:
Screw drivers
6 of 8 peoplefound this instruction helpful.
Was this instruction helpful to you?
Thank you for voting!
Upper rack not cleaning-whole dishwasher not cleaning
Used bowls in upright position in upper shelf determining no water to upper shelf after running in rinse cycle. Added a cup of Vinegar in rinse cycle. Performed bowl test in upper rack & still no water in bowls. Dismantled inside of unit by removing both spray arms & found lower seal deteriorated & upper seal in need of replacing. Replaced seals & redid bowl test & found no water getting to top rack still. Found utube vid showing removing garbage disposal portion of unit. Requires removing screen in bottom of dishwasher. One screw attaches garbage disposal cover. Found non food items & food by broken garbage disposal. Repaired disposal, removed debri & reinstalled all components. Redid bowl test in upper shelf & bowls were overflowing!!????Dishwasher works GREAT now & can hear garbage disposal operating along with massive water being sprayed!!!
Ask our experts a question about this part and we'll get back to you as soon as possible!
3 questions answered by our experts.
< Prev
1
Next >
Sort by:
Search filter:
Clear Filter
Your search term must have 3 or more characters.
Keep searches simple. Use keywords, e.g. "leaking", "pump", "broken" or "fit".
Sorry, we couldn't find any existing answers that matched.Try using some different or simpler keywords, or submit your new question by using the "Ask a Question" button above!
Brad
July 20, 2017
I'm having issues with the spray arm not cleaning the upper shelf. I believe the issue may be with the spray arm seal (part number: Ps11745444). The one from my dishwasher has a 1mm break in it. I can't tell if this is how they are manufactured however. Are the new ones a complete circle with no break?
For model number kuds35fxss5
Hi Brad, great question. The spray arm seal for your dishwasher (part number: PS11745444) is in fact manufactured with the 1mm break in it that you describe. Replacing the seal may help with the issue of the spray arm not cleaning the top rack properly. However, if this does not solve the problem, you can visit our repair help section to determine what other parts could cause this symptom. I hope this helps you, and good luck with the repair.
24 people found this helpful.
Was this helpful?
Thank you for voting!
Cherri
December 28, 2017
Top rack of glasses are not clean, dishes are clean in bottom rack, put bowls right side up and they fill with water, but glasses are not rinsed enough, stains on coffee cups, and foggy glasses
For model number GU2275XTVY0
Hi Cherri,
Thank you for your question. If the dishes on the upper rack are not getting clean, there are some parts that you will need to check to see which one is causing the issue. You will need to check the chopper assembly, the spinner kit, the spray arm seal, sump pump check valve, the spray arm seal, the impellar and seal kit, the heating element, the circulation pump and motor, the lower spray arm support/hub, the water supply manifold probe and the feed tube assembly with spinner. I hope this helps. Thank you and have a great day!
11 people found this helpful.
Was this helpful?
Thank you for voting!
Jerry
November 28, 2018
Dishwasher is very noisy and not using detergent during cycle?
For model number MDB7759AWS3
Hello Jerry, Thank you for the question. This sounds like an issue with the Circulation Pump Motor, PartSelect Number PS11757387. If the puck motor is defective, it can cause a lot of noise and not pump the water to the spray arms allowing it to reach the soap dispenser to use the soap. Hope this helps, good luck with this repair!
The spray arm in your dishwasher spins and sprays the water that is used to clean your dishes. If the spray arm is damaged, your dishwasher will not clean properly, and you will need to replace it. Many of our customers ...