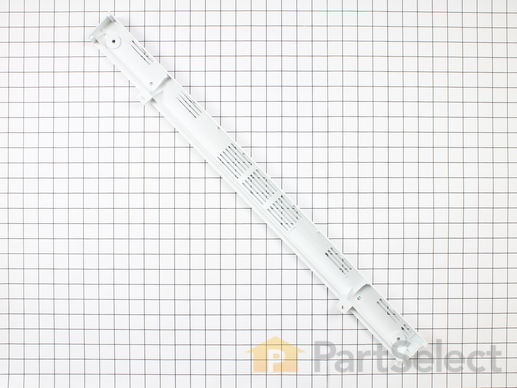
Product Description
Door Top Trim Specifications
This top door trim is just over thirty inches long. It is all white in color and is made of plastic.
How Buying OEM Parts Can Save You Time and Money
Part Videos
Replacing your Maytag Range Door Top Trim
Troubleshooting
This part works with the following products:
Range, Wall Oven.
This part works with the following products:
Maytag, Jenn-Air.
Part# WP74003653 replaces these:
AP6010850, 71003504, 74003653, 74004560, 7706P326-60, 7706P514-60
Customer Reviews
Filter By Rating:
- < Prev
- 1
- Next >
Sort by:
Search filter:
Clear Filter
Your search term must have 3 or more characters.
Keep searches simple. Use keywords, e.g. "leaking", "pump", "broken" or "fit".
Sorry, we couldn't find any existing reviews that matched. Try using some different or simpler keywords.
Adam S - January 23, 2019
Verified Purchase
Easy to repair and great service.
Great service as the part was delivered in 2 days just as they promised. I will use this site again
- < Prev
- 1
- Next >
Customer Repair Stories
Average Repair Rating: 4.0 / 5.0, 11 reviews.
What's this?
- < Prev
- 1
- 2
- Next >
Sort by:
Search filter:
Clear Filter
Your search term must have 3 or more characters.
Keep searches simple. Use keywords, e.g. "leaking", "pump", "broken" or "fit".
Sorry, we couldn't find any existing installation instruction that matched.
Door handle and trim broke
1st removed the door from the hinges by sliding it up. Then removed all the screws holding the door together. Then removed the screw securing the trim. Removed the screws from inside the trim holding the old handle... replaced the handle and trim. replaced all screws in reverse order. Replaced the door on the hinges. all done
Other Parts Used:
-
RICHARD from Stafford, VA
-
Difficulty Level:Really Easy
-
Total Repair Time:15 - 30 mins
-
Tools:Screw drivers
25 of 30 people
found this instruction helpful.
Was this instruction helpful to you?
Thank you for voting!
Broken Handle, Oven temperature problem
I removed the door by opening partially and pulling upward. It was a little heavy and you should make sure you have somewhere to put it. I removed screws and reinstalled the handle into the new door trim that had broken. It gave a great opportunity to clean the oven.
I then unscrewed the temp sensor from inside the oven and removed the back panel of the range to unplug the wires. I plugged in the new wires and tightened the screws.
The light bulb was easy. I pulled off the cover and unscrewed the old and screwed in the new. It was a lot of screwing and unscrewing but 3 easy tasks all the same.
Other Parts Used:
-
Lawrence from New Orleans, LA
-
Difficulty Level:Easy
-
Total Repair Time:30 - 60 mins
-
Tools:Screw drivers
13 of 14 people
found this instruction helpful.
Was this instruction helpful to you?
Thank you for voting!
Handle to top oven coming off
It wasn't the handle that was broken, it was what the handle was attached to that was. I removed the door by opening to first detent and just lifting the door upward. Once off, I removed the screws on the top sides and underneath - a total of 9. This allowed me to remove the edging on the sides and underneath - the front glass came with it as well. Then I removed the Top trim by removing a screw on each of the sides and two on the front - this was the piece that was broken. Since I had already disassembled most of the door, I went ahead and dismatled the rest so that I could clean everything. The pieces that would fit went into the dishwaser and the rest (including the glass) I washed by hand (except the white insulation pieces of course). I did take apart the double glass panel by lifting up on a bent tab on one of the corners - this allowed me to clean the insides as well as the groves in which the glass sat. After everything was clean, I reassembled everything in the reverse order substituting the new trim for the old.
Notes: The top of the trim piece has two diferent screws - two short ones that screws into the trim piece itself and two that go through to the door metal. The screw that I ordered ended up being one of the short ones and I wanted the other. The snap nut was correct, and was what the longer screw to the trim actually grabs on to. I ended up using one of my own screws that fit like a dream, but wasn't painted white. The other note is that the sheet metal that the trim piece screws into from the front was slightly stripped. All I had to do was to place the metal on a hard surface and hit the holes with a hammer to bring them back into a usable form - not ideal, but worked nonetheless.
Other Parts Used:
-
Robert from Dayton, OH
-
Difficulty Level:Easy
-
Total Repair Time:15 - 30 mins
-
Tools:Screw drivers
10 of 10 people
found this instruction helpful.
Was this instruction helpful to you?
Thank you for voting!
out side glass shattered and plastic housing brittle and broke
we took the oven door off the hinges and placed it on a flat surface (out side face up)
Took the door handle and top plate off and set aside the screws.
Cleaned the glass that remained and all the other parts.
Attached the new plastic top door trim, and the slipped in the replacement glass. No instructions on how to use the foil strip we ordered, so we didn't use it
Tightened all the screws and put the door back onto the hinges, making sure we didn't use the handle to carry the door or to slide the stove back into place. The weakest link here is using the oven door handle to pick up / move the stove. We just opened the oven door and put our hands inside the oven.
Other Parts Used:
-
Shirley from Hudsonville, MI
-
Difficulty Level:Really Easy
-
Total Repair Time:Less than 15 mins
-
Tools:Screw drivers
9 of 13 people
found this instruction helpful.
Was this instruction helpful to you?
Thank you for voting!
Oven Handle broke off the door trip
Lifted off the door, unscrewed all sides of the door attached the handle to the new trim, and screwed everything back together. It at first was not obvious how to remove the old trim, but the trick was to unscrew all sides of the door (bottom, top and on each side). The door just lifts right off easily. Then you unscrew the old trim and screw in the new trim (be sure to attache the handle first!), and then reinstall the sides and front glass by sliding into place and put back all the screws.
Then slide back on the repaired door.
Other Parts Used:
-
Jesse from Brooklyn, NY
-
Difficulty Level:Easy
-
Total Repair Time:15 - 30 mins
-
Tools:Screw drivers
6 of 6 people
found this instruction helpful.
Was this instruction helpful to you?
Thank you for voting!
Oven Door Handle Was Broken Off And The Top Trim Was Also Broken
I removed the door, then removed the 5 screws holding the bottom and side trim on. I slid the trim down with the glass front. This exposed the screws holding the top trim on. I then removed the 8 screws holding the top on. At this point I took the opportunity to clean the three layers of glass. I then put the new handle onto the top trim, then installed it, then re-assembled the door and put it back on the stove. It took about 30 minutes including cleaning. Simple!
Other Parts Used:
-
DOUGLAS from HOLDEN, MA
-
Difficulty Level:Easy
-
Total Repair Time:30 - 60 mins
-
Tools:Screw drivers
4 of 4 people
found this instruction helpful.
Was this instruction helpful to you?
Thank you for voting!
Broken Door Handle
Pretty straightforward repair.
Remove the storage drawer under the door.
Remove the top trim piece that holds the plastic trim to the door.
Remove the 6 screws that hold the front panel glass trim in place and slide the panel out from under the door trim.
Remove the door trim from the door by removing the side screws (1 each side) and the 2 on the front.
Remove the handle from the trim by removing the 4 retaining screws.
To re-assemble, reverse the process.
Total time: 15 to 30 minutes.
Other Parts Used:
-
Leonard from Canton, OH
-
Difficulty Level:Easy
-
Total Repair Time:15 - 30 mins
-
Tools:Screw drivers
3 of 3 people
found this instruction helpful.
Was this instruction helpful to you?
Thank you for voting!
Oven door handle had broken off plastic door trim
Thanks to a previous poster who confirmed the need to remove ALL the screws around the door frame. I had removed the door (by opening it slightly and pulling it up off the hinges) then removed the screws all the way around the outside of the door. Once I could separate the front of the door from the back, I removed the remaining screws securing the plastic trim to the top of the door. While waiting for the part to arrive, I cleaned the interior of the door. The part fit exactly and the replacement was easy after attaching the handle to the front of the trim...with one small problem. Two of the screw holes along the top of the door were too large for the factory screws. I still have to make a hardware run and pick up slightly larger sheet metal screws with pan heads and some white touch-up paint. Then we'll be good to go!
Other Parts Used:
-
GREGORY from BATTLE CREEK, MI
-
Difficulty Level:Really Easy
-
Total Repair Time:30 - 60 mins
-
Tools:Screw drivers
2 of 4 people
found this instruction helpful.
Was this instruction helpful to you?
Thank you for voting!
The top trim piece broke during a move and cleaning effort.
Identified the parts through the diagram from the web page, verified th parts needed to accomplish this repair. Ordered the parts needed, then researched the Maytag parts web site, along with another parts web site to verify the price and that the correct parts were being purchased. completed the parts order from a cheaper source and received the parts in two days. Broken piece was removed and the new part insalled within 25 minutes, the oven is operating normally and looks like a new unit.
Other Parts Used:
-
Jay from Hereford, AZ
-
Difficulty Level:Easy
-
Total Repair Time:15 - 30 mins
-
Tools:Screw drivers, Wrench (Adjustable)
1 of 2 people
found this instruction helpful.
Was this instruction helpful to you?
Thank you for voting!
Top trim broke, its what the handle mounts to
Installed the handle on the new trim with the 2 screws, then mounted the trim on the door of the oven. putting the glass into the groove of the trim. Secured the trim with 4 screw across the top of the door. (I got my part in only 2 days with standard shipping Thanks PartsSelect)
Other Parts Used:
-
Rodger from Petaluma, CA
-
Difficulty Level:Really Easy
-
Total Repair Time:15 - 30 mins
-
Tools:Screw drivers
0 of 1 people
found this instruction helpful.
Was this instruction helpful to you?
Thank you for voting!
- < Prev
- 1
- 2
- Next >
Questions and Answers
We're sorry, but our Q&A experts are temporarily unavailable.
Please check back later if you still haven't found the answer you need.
Related Parts
Model Cross Reference
This part works with the following models:
PartSelect Number: PS11744040
Manufacturer Part Number: WP74003653
Brand
Model Number
Description