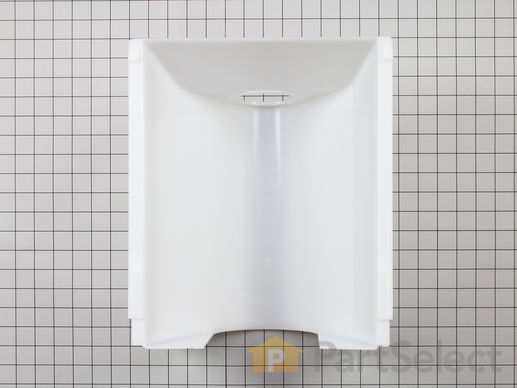
Part Location Diagram of WP67005959 Whirlpool Ice Bucket
See part 1 in the diagram
( Grid squares measure 1x1 inch )
Customer Service Representative

Get in touch, we're here to help!

Daily 8am - 9pm EST

customerservice@partselect.ca

Ice Bucket

$198.08
  Special Order
PartSelect Number PS11743653
Manufacturer Part Number WP67005959
Manufactured by Whirlpool
Product Description

Ice Bucket Specifications

Bucket only.
How Buying OEM Parts Can Save You Time and Money

How Buying OEM Parts Can Save You Time and Money

Troubleshooting
This part fixes the following symptoms:
Ice maker won’t dispense ice | Ice maker not making ice
This part works with the following products:
Refrigerator.
This part works with the following products:
Amana, Maytag, Kenmore, Jenn-Air.
Part# WP67005959 replaces these:
AP6010473, 12517801, 67005067, 67005959
Back to Top
Customer Repair Stories
 Average Repair Rating: 4.0 / 5.0, 29 reviews. What's this?
  • 1
  • 2
  • 3
Sort by:
Sorry, we couldn't find any existing installation instruction that matched.
Ice maker was leaking water and causing ice globs in ice bucket.
Parts were available at the locat applicance store, but the cost was 20-25% higher than ordering through Parts Select (including shipping) + it was delivered in 3 days right to the house.

Removing and replacing the ice maker was fairly straight forward. Tight quarters to work in, but managable.

1. With the freezer turned off, uplug the ice maker power cable at the back of the freezer.
2. Remove the four phillips head screws and ice bucket rail to the side of the freezer. I found it was easier to re-install the new ice maker with the rail clear off.
3. Loosen the two upper hex head screws holding the ice maker (requires a nut driver).
4. Lift the ice maker up and off of the upper screws.
5. With the ice maker out of the freezer, remove the power cable from the old ice maker and re-install on the new ice maker. At this point, both the front cover and the on/off lift bar can be transfered from the old ice maker to the new one.
6. Slip the new ice maker down over the two upper screws making sure the lower mounting tab is behind the ice bucket rail. Make sure the hole on lower mounting tab lines up with screw hole.
7. Re-install the ice bucket rail and tighten all screws. Make sure the water supply tube is lined up correctly feeding into the ice maker.
8. Re-connect ice maker power cable at the back of freezer and turn freezer back on.

It took about 4 hours for the first ice to generate. It cycled normally after that. No more leaks or ice globs in the ice bucket.
Other Parts Used:
Replacement Ice Maker
  • Stanley from Cortland, OH
  • Difficulty Level:
    Easy
  • Total Repair Time:
    15 - 30 mins
  • Tools:
    Nutdriver, Screw drivers
210 of 230 people found this instruction helpful.
Was this instruction helpful to you?
Thank you for voting!
Ice maker would not turn allowing the ice to come out the dispenser. The ice bucket was also cracked from kids (ok and parents) getting frustrated and shaking the ice bucket!
Piece of cake!

Removed the old ice bucket which was cracked and ice would not dispense. The Helix Cap also looked worn which is why I ordered both parts. (Probably if not for the shaking of the ice bucket the Helix cap would have been the only part required. We ended up cracking the ice bucket) Removed the four hex screws from the auger system on the old ice bucket with a socket wrench. Removed the old Helix end cap from the auger system and replaced with the new. Literally just slips on the auger. Reinstalled auger system back onto the new ice bucket. Total time not even five minutes.

Working great! Probably saved $ 75.00 - $ 100.00 on a service call. Half of a wrench on skill level needed (One=Low skill level/ Five=High skill level)

Great response & delivery from Parts Select!
Definitely recommend highly.

Todd
Lancaster-PA
Other Parts Used:
Ice Maker Helix End Cap - white
  • Todd from Lancaster, PA
  • Difficulty Level:
    Really Easy
  • Total Repair Time:
    Less than 15 mins
  • Tools:
    Socket set
50 of 56 people found this instruction helpful.
Was this instruction helpful to you?
Thank you for voting!
the auger was bent away from the cap and ice bucket was cracked
i had a serviceman look at it and he said it needed 6 parts, so i went to parts select and found the parts that i needed and i only needed 2 parts, the icemaker auger assembly and the ice bucket. It is working just like new again!!! thank you parts select, order on one day and recieved it the next day now thats what i call very fast service and shipping. If i should ever need parts for anything else parts select is the place i will go to. thank you again
carol
quincy il
Other Parts Used:
Ice Maker Auger and Crusher Blade Assembly
  • Carol S. from Quincy, IL
  • Difficulty Level:
    Really Easy
  • Total Repair Time:
    Less than 15 mins
29 of 630 people found this instruction helpful.
Was this instruction helpful to you?
Thank you for voting!
Evaporator Kept Icing Up , Not Getting Cold Fridge Side
Had to take everything out of freezer including shelves. Removed lower back panel to expose evap. Assm. And thermostat. Defrosted evap using a handheld blower drier while using a shop vac to suck out the melting water from the evaporator tray while melting. Installed the thermostat utilizing color coded wires and did a test run. Worked perfectly after that.
Other Parts Used:
Defrost Thermostat Kit Defrost Heater
  • MICHAEL from WILLIAMSBURG, OH
  • Difficulty Level:
    A Bit Difficult
  • Total Repair Time:
    1- 2 hours
  • Tools:
    Nutdriver, Pliers, Screw drivers
26 of 34 people found this instruction helpful.
Was this instruction helpful to you?
Thank you for voting!
The crushed ice agitator kept slipping out of the bracket.
With the repair parts ordered and received from PartsSelect.com, I was able to install a new Ice Bucket and the crushed ice agitator assembly. This simple repair has the refrigerator dispencing ice like new.
Other Parts Used:
Ice Maker Auger and Crusher Blade Assembly Ice Maker Helix End Cap - white
  • Charles from Plano, TX
  • Difficulty Level:
    Really Easy
  • Total Repair Time:
    Less than 15 mins
  • Tools:
    Nutdriver
19 of 23 people found this instruction helpful.
Was this instruction helpful to you?
Thank you for voting!
ice maker worked but would not release the ice through the door
The part that actually moved the ice in the bucket itself kept slipping off the ice bucket in the refrigerator. This was causing ice not to be dispensed. It turned out to be a screw hole that was stripped and was not tight enough to keep the part in place to work properly. I just took it apart and replaced the bucket, put the screw back in and within 10 minutes we were done. I also ordered a new drawer that was broken for the deli meats. I know this was caused by my 6 year old daughter not closing the drawer correctly and the front door getting closed on it. I will have to say when I first came to the site to place my order I thought I was going to have to pay alot more than I did for the parts. The pictures were a great help in finding exactly what I needed. The order was received in great condition and very fast. I will be ordering from you again in the future if I ever need anything else repaired. Thanks for helping a women be independant and fix her own repairs.
Other Parts Used:
Blade Cover Crisper Drawer - Clear Ice Crusher Front
  • Vickie from Antioch, TN
  • Difficulty Level:
    Really Easy
  • Total Repair Time:
    15 - 30 mins
  • Tools:
    Screw drivers
19 of 23 people found this instruction helpful.
Was this instruction helpful to you?
Thank you for voting!
Ice Maker Leaking
Replacing the icemaker was easy. I unplugged the icemakers wire harness from the refrigerator and then removed three screws. Installing was the reverse of the procedure. I just lined up the single screw of the bracket and the track, reinstalled the three screws and then plugged the icemaker back in. Took less than 15 minutes. After the icemaker got to the right temperature (about an hour) it was making ice again.

I removed the auger, cap, and crusher assembly from the ice bin, by removing the top 2 screws with a small nut driver. Put these parts on the new ice bin and tightened the 2 screws/nuts at the top of the bin and slid the ice bucket back into place.
Other Parts Used:
Crisper Pan - Large Replacement Ice Maker
  • Michael from Omaha, NE
  • Difficulty Level:
    Easy
  • Total Repair Time:
    15 - 30 mins
  • Tools:
    Nutdriver, Screw drivers
16 of 23 people found this instruction helpful.
Was this instruction helpful to you?
Thank you for voting!
ice maker wouldn't work
First I removed the outer shell part then removed the 4 screws holding the ice bin together.After taking the parts out of the old ice bin it was easy to put all the new parts together except the new helix end cap which was a bit tricky to put it in place.It wasn't difficult to reassemble but I would stongly suggest taking notice how everything fits together before taking it apart.
Other Parts Used:
Refrigerator Water Filter Ice Maker Helix End Cap - white
  • Ty from Shepherdsville, KY
  • Difficulty Level:
    Easy
  • Total Repair Time:
    15 - 30 mins
  • Tools:
    Nutdriver, Screw drivers
14 of 23 people found this instruction helpful.
Was this instruction helpful to you?
Thank you for voting!
the helix end cap broke and the ice maker wouldn't dispence ice
Well it was very simple. I just pulled out the ice cube bucket , removed a few screws from the front of the bucket, pulled the front panel off, replaced the helix end cap too the auger, put all of it back together into a new ice bucket, screwed the front panel back on , than lined up the auger to line up with motor shaft of the freezer motor and what do you know I HAD ICE. My family was happy and i did this for under thirty dollars. A repairman would of cost more than three times that just to look at problem and would of cost more for the parts and the second trip to fix it. Thanks you for making it easy to find the part and for the quick delivery of the parts.
Other Parts Used:
Ice Maker Helix End Cap - white
  • jeff from brownsburg, IN
  • Difficulty Level:
    Really Easy
  • Total Repair Time:
    Less than 15 mins
  • Tools:
    Screw drivers
12 of 18 people found this instruction helpful.
Was this instruction helpful to you?
Thank you for voting!
ice bucket had a hole in it.
removed old ice bucket by lifting up on the front and pulling straight out.Remove the front it just snaps into place.Remove the cutter comes out real easy.Put these parts on the new bucket.Slide the new bucket back in your done.
Other Parts Used:
  • John C. from Erlanger, KY
  • Difficulty Level:
    Easy
  • Total Repair Time:
    15 - 30 mins
11 of 11 people found this instruction helpful.
Was this instruction helpful to you?
Thank you for voting!
  • 1
  • 2
  • 3
Questions and Answers

Ask our experts a question about this part and we'll get back to you as soon as possible!

1 question answered by our experts.
  • 1
Sort by:
Sorry, we couldn't find any existing answers that matched.Try using some different or simpler keywords, or submit your new question by using the "Ask a Question" button above!
Larry
January 6, 2024
Motor turns good,when I add the Assembly makes 1turn then it begins to make a bumping sound
For model number ASD2622HRW
PartSelect logo
Hello Larry, thank you for reaching out. You will need to empty the ice bin and make sure there are no small particles built up in the bottom of the ice bin that have frozen together and seized the auger. Use hot water to remove any sediments and re-try. If this does not help, you may need to replace the auger motor, part number PS11743528. We hope this is helpful!

Was this helpful?
Thank you for voting!
Related Parts:
  • 1
Related Parts
Model Cross Reference
This part works with the following models:
PartSelect Number: PS11743653
Manufacturer Part Number: WP67005959
Brand
Model Number
Description
Kenmore
59650002100
Refrigerator
Kenmore
59650003100
Refrigerator
Kenmore
59650004100
Refrigerator
Kenmore
59650009100
Refrigerator
Kenmore
59650012100
Refrigerator
Kenmore
59650013100
Refrigerator
Kenmore
59650014100
Refrigerator
Kenmore
59650019100
Refrigerator
Kenmore
59651672100
Refrigerator
Kenmore
59651673100
Refrigerator
Kenmore
59651674100
Refrigerator
Kenmore
59651679100
Refrigerator
Kenmore
59652672200
Refrigerator
Kenmore
59652672201
Refrigerator
Kenmore
59652672202
Refrigerator
Kenmore
59652673200
Refrigerator
Kenmore
59652673201
Refrigerator
Kenmore
59652673202
Refrigerator
Kenmore
59652674200
Refrigerator
Kenmore
59652674201
Refrigerator
Kenmore
59652674202
Refrigerator
Kenmore
59652679200
Refrigerator
Kenmore
59652679201
Refrigerator
Kenmore
59652679202
Refrigerator
Kenmore
59653462300
Refrigerator
Kenmore
59653462301
Refrigerator
Kenmore
59653462302
Refrigerator
Kenmore
59653463300
Refrigerator
Kenmore
59653463301
Refrigerator
Kenmore
59653463302
Refrigerator
Customer Service Representative

Get in touch, we're here to help!

Daily 8am - 9pm EST

Contact Customer Service