Product Description
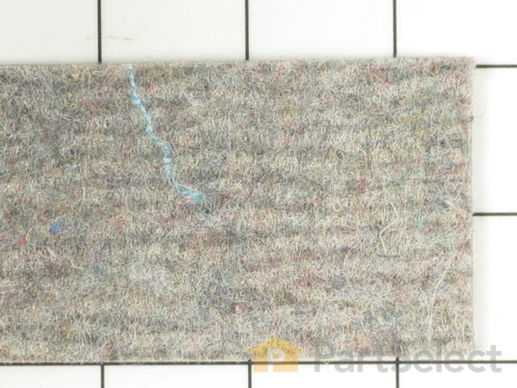
Tumbler Seal Specifications
The tumbler seal can be used for the front or rear. Sold individually.

How Buying OEM Parts Can Save You Time and Money
Troubleshooting
This part fixes the following symptoms:
Noisy
This part works with the following products:
Dryer.
This part works with the following products:
Maytag.
Part# WP33313541 replaces these:
AP6008020, 3-12968, 3-13541, 312968, 313541, 33313541, Y313541
Customer Reviews
Filter By Rating:
- < Prev
- 1
- Next >
Sort by:
Search filter:
Clear Filter
Your search term must have 3 or more characters.
Keep searches simple. Use keywords, e.g. "leaking", "pump", "broken" or "fit".
Sorry, we couldn't find any existing reviews that matched. Try using some different or simpler keywords.
Dean H - February 8, 2024
Verified Purchase
too short
seals were 3 inches too short for my drum. had to splice a couple of short pieces of felt in to make them work.
- < Prev
- 1
- Next >
Customer Repair Stories
Average Repair Rating: 2.6 / 5.0, 3 reviews.
What's this?
- < Prev
- 1
- Next >
Sort by:
Search filter:
Clear Filter
Your search term must have 3 or more characters.
Keep searches simple. Use keywords, e.g. "leaking", "pump", "broken" or "fit".
Sorry, we couldn't find any existing installation instruction that matched.
Drum rubbing metal to metal on front support
1. Unplugged dryer, removed front (2 phillips screws near bottom) set aside with wires attached
2. Removed front support (4 hex head screws)
3. Drilled out pop-rivets, discarded old glides (why didn't Maytag use rollers?)
4. Riveted new glides in place.
5. (Oops!) trimmed cork pads, smeared with glue, shoved under glides, held down until firm
6. Removed drum (pushed belt back to groove, pulled drum off rollers, lifted belt off drum, worked drum out) Left belt on pulley and tension wheel as pattern when I replace it.
7. Scraped old gasket felt off back chassis and front support
8a. Folded gasket lengthwise and glued into front support channel with fold on outside diameter. It was too short.
8b. (Oops! Why didn't this come with instructions?) Pulled it out, reversed it and replaced it with fold to inside diameter. It fit. Glued ends together.
9. Glued other felt gasket into back chassis. (Good ventilation needed here!)
10. Replaced rollers. (This did have instructions, despite being easy. I didn't use any grease. Experience as a locksmith says don't lube anything that isn't sealed from dust. I also vacuumed out 15 years of dust.)
11. Replaced belt. (The old one looked fine, but I was advised to do the belt and rollers along with the glides.) The grooves touch the drive pulley, the flat goes around the tensioner, and the belt exiting to the left seems like it will rub the pulley, but it doesn't once the drum is installed.
12. Turn the drum around (Nice, it's symmetrical!) and work it back in.
13. Lift the belt around the drum edge (I used bull clips to hold it in place.)
14. Check the belt on the pulleys, move the drum in more, take off clips, move the belt to the groove.
15. put the drum on the rollers, lift the belt out of the groove, and spin the drum a little while watching the pulleys to check it.
16. Screw the front support back in place.
17. Screwed the front on and plugged it in.
It works!
Other Parts Used:
-
Jim from Los Angeles, CA
-
Difficulty Level:A Bit Difficult
-
Total Repair Time:More than 2 hours
-
Tools:Nutdriver, Pliers, Screw drivers
32 of 39 people
found this instruction helpful.
Was this instruction helpful to you?
Thank you for voting!
scraping sounds from drum; dirt marks and ripps on clothes.
Removed top screws and the front cover.
Removed lint filter harness/air vent assembly (two screws inside dryer tumbler, 6-7 screws along vent assembly).
Removed front dryer tumbler sealer panel (2 screws on each side).
Scraped off old felt sealer with screwdriver.
Drilled out remnants of old rivets.
Replaced gliders with cork underneath.
Riveted gliders into position.
Used mighty putty to fill the cut metal around the top of the sealer panel (resulting from the dryer tumbler rubbing without proper gliders).
Glued new felt sealer around tumbler sealer panel.
Reassembled the entire unit in reverse order.
Other Parts Used:
-
Kerry from South Ozone Park, NY
-
Difficulty Level:Easy
-
Total Repair Time:1- 2 hours
-
Tools:Nutdriver, Screw drivers
12 of 13 people
found this instruction helpful.
Was this instruction helpful to you?
Thank you for voting!
Noisy when operating
Reviewed U Tube video instructions carefully,it was the best in the world.Told what tools needed to complete repairs and exactly how to go about making repairs.Only thing tumbler seal glue not clipped as shown in video. As it turned out tumbler seal not long enough to install in one piece needed use another seal.
Other Parts Used:
-
James from Beecher, IL
-
Difficulty Level:Really Easy
-
Total Repair Time:1- 2 hours
-
Tools:Pliers, Screw drivers, Socket set, Wrench set
1 person
found this instruction helpful.
Was this instruction helpful to you?
Thank you for voting!
- < Prev
- 1
- Next >
Questions and Answers
Ask our experts a question about this part and we'll get back to you as soon as possible!
- < Prev
- 1
- Next >
Sort by:
Search filter:
Clear Filter
Your search term must have 3 or more characters.
Keep searches simple. Use keywords, e.g. "leaking", "pump", "broken" or "fit".
Sorry, we couldn't find any existing answers that matched.Try using some different or simpler keywords, or submit your new question by using the "Ask a Question" button above!
Roger Ball
January 22, 2020
Do you sell or can you tell me which glue to use to attach the felt seal ( #ps11741149) to the dryer?
For model number DG712

Hello Roger, thank you for your question. The adhesive if PS11757492. Good luck with your repair.
1 person found this helpful.
Was this helpful?
Thank you for voting!
Related Parts:
Richard
November 6, 2019
My old Maytag has two different rollers for the back drum support 1 has sealed bearings. 2 has a roller that has no bearing at all. I don’t see why there are two different styles. Both of my metal rollers have begun to rust and show imperfections. One of my rollers has no metal attached to the plastic roller. Should i just replace both with sealed bearings?
For model number LDE512

Hello Richard and thanks for writing.
Yes it is best to repair both roller bearings, there is a drum support roller kit #PS1570070 available
This drum support roller includes one drum roller and two bearings. Most dryers use two drum rollers, and it is recommended to change both at once. Hope this helps. Please contact us anytime.
Was this helpful?
Thank you for voting!
Related Parts:
- < Prev
- 1
- Next >
✖
Ask a Question
Ask our experts a question on this part and we'll respond as soon as we can.
Sorry, we couldn't find a match for "".
Here's a guide for finding your model number.
Something went wrong. Please try again later.
Your Question Has Been Submitted!
Our experts will send you an email as soon as your question has been answered.
Related Parts
Model Cross Reference
This part works with the following models:
PartSelect Number: PS11741149
Manufacturer Part Number: WP33313541
Manufacturer Part Number: WP33313541
Brand
Model Number
Description


