This part is commonly known to cause a leak at the top left corner of the outer tub. It fits over the injector nozzle.
How Buying OEM Parts Can Save You Time and Money
Part Videos
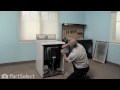
Replacing your Maytag Washer Rubber Injector Valve
Troubleshooting
This part fixes the following symptoms:
Leaking
This part works with the following products:
Washer, Washer Dryer Combo.
This part works with the following products:
Maytag, Jenn-Air.
Part# WP216201 replaces these:
AP6005883, 2-13016, 2-16201, 213016, 216201
Customer Reviews
Average Rating:
★★★★★
★★★★★
14 Reviews
5.0
Filter By Rating:
5 Stars
14
4 Stars
0
3 Stars
0
2 Stars
0
1 Star
0
< Prev
1
2
Next >
Sort by:
Search filter:
Clear Filter
Your search term must have 3 or more characters.
Keep searches simple. Use keywords, e.g. "leaking", "pump", "broken" or "fit".
Sorry, we couldn't find any existing reviews that matched. Try using some different or simpler keywords.
★★★★★
★★★★★
Peter M - 18 days ago
Verified Purchase
Leakyinjector valve
Quick and easy. Video was most helpful.
★★★★★
★★★★★
Bill O - November 18, 2022
Verified Purchase
Injector Valve Replace
Online diagnosis was bang on. Repair instructions made it easy. Leak fixed. Highly recommend this site
★★★★★
★★★★★
Glenn F - August 4, 2022
Verified Purchase
Quick service, simple repair
Part fit perfectly, and the online video from PartSelect made the whole process very easy. Great service!
★★★★★
★★★★★
Daniel C - May 13, 2021
Verified Purchase
Perfect fit
The part was exactly what was needed for the water leak.
★★★★★
★★★★★
Roger B - March 24, 2021
Verified Purchase
Same as original
The part was exactly like the original, making for a simple repair
★★★★★
★★★★★
Jordan L - March 16, 2021
Verified Purchase
Worked perfect!
It was the part I needed for the leak I had. It fit perfectly and washer is back in working order. Thanks
★★★★★
★★★★★
David B - December 19, 2020
Verified Purchase
Easy repair gives a very old washer new life
The part was easy to install and solved the leak. I was pretty sure I knew how to do the repair, but having the video was still a great help since I always worry I am missing something. The only way to get a new washer into our >120 year old basement is to disassemble it, and even then the drum of many models might not fit down the stairs, so I depend on PartSelect to keep our almost 30 year old washer running as long as possible.
★★★★★
★★★★★
Stuart N - April 11, 2020
Verified Purchase
Easy repair, good part
PartSelect parts are great quality, fast shipping and great install videos
★★★★★
★★★★★
Jim S - October 16, 2019
Verified Purchase
Easy repair job for small amount of water spritzing out of the air injector.
It shipped fast and installed perfectly. This part, along with the white plastic injector nozzle. It was a nice touch that Partselect provided a link to an installation video. Works perfect, our washer is back to normal, no more little dribbles of water on the floor.
★★★★★
★★★★★
Glen T - April 16, 2019
Verified Purchase
Correct part and fit perfectly
Shipped quickly and video ensured I put it together correctly.
< Prev
1
2
Next >
Customer Repair Stories
Average Repair Rating: 3.6 / 5.0, 66 reviews.
What's this?
< Prev
1
2
3
Next >
Sort by:
Search filter:
Clear Filter
Your search term must have 3 or more characters.
Keep searches simple. Use keywords, e.g. "leaking", "pump", "broken" or "fit".
Sorry, we couldn't find any existing installation instruction that matched.
Front load washing machine leaking on floor while in fill mode.
Removed two screws at bottom of front panel and then removed front panel. Then removed two self-tapping bolts (one on each side) holding top panel in place and swung the panel up, out of the way, to expose top of tub and water injection components. Cut off one pinch clamp and loosened screw clamp holding two injector hoses to the injector sleeve. Removed these water injector hoses from injector sleeve assembly which is mounted on top of left side panel upper flange. Replaced deteriorated rubber injector valve, nozzle and the sleeve for the injector (plastic housing containing the injector valve and nozzle). Also replaced deteriorated injector tube seal where injector tube elbow mounts to top of tub assembly. Reinstalled injector hoses with a replacement screw clamp to replace the one cut off. tightened the new clamp and the other, original, screw clamp and checked for leaks. This solved the leakage problem. Secured top panel and re-installed front panel. Hardest part of the task was determining where the leak emanated from but once found and parts ordered, it was a relative snap to fix.
For several years the washer has moaned and groaned while filling, and filled slower than when new. It seemed to be associated with the inlet water valves. Then, it began to leak water from time to time, with the frequency and amount increasing.
I thought I had only a water valve problem - both the noise and leak seemed to come from the water valve assembly - but I had two. After replaced the water valve (a job which was easy to do as the assembly was easily accessed from the rear of the machine) the moaning stopped but I was surprised to discover that I had a stream of water pouring from under the machine.
I pulled the front panel (two phillips head screws needed to be removed) and raised opened the top assembly after removing two hex screws. (The diagram on PartSelect.com was helpful in understanding what I had to deal with).
I observed the fill action, and found that the water was leaking from the slots in the fill nozzle sleeve, in the water injector hose line. (The new inlet water valves had increased the pressure at the fill nozzle and increased the leak from that point which I had not suspected to be the source of the leaking water).
The basic problem was that the rubber valve sleeve had shrunk in length and was no longer flexible, allowing water to come out of the sleeve slots. I ordered an injector nozzle and valve and installed them in the original sleeve bracket in just a few minutes (two clamps had to be loosened, and the hose sections pulled back to insert the valve and nozzle assembly). (I had also ordered a replacement bracket just in case the old one might break, but it was not the correct part and the old one was fine.)
I checked for leaks and closed up the machine. Problems solved! It is now both quiet and leak-free.
(Moral, open the machine and check the nozzle for leaks - even if you suspect only the water valve assembly. The nozzle valve is located above the water valve and its leaks drop onto the water valve, making it look like the water valve assembly is the source of the leak.)
Loosened the hose clamp, removed the injector valve and injector nozzle assembly, replaced both and tightened with new hose clamp. Fixed the problem for less than $20!! Washing machine is 20 years old and this was the first problem--hopefully it is now good for another 20 years!
Water was leaking at the injector nozzle during the fill cycle. I could not visually see any damage to the existing part, but, ordered replacement parts, anyway. The new parts arrived and looked EXACTLY like the old ones. Clearly, the new parts would leak, too. So, I cut a three-inch length of 3/4-inch OD pipe and spliced the two hoses together, completely eliminating the troublesome parts. The washer works fine and does not leak. And, it fills much faster, now. I still have no clue as to the purpose of the injector nozzle nor do I know why it did NOT leak for 30 years.
First I disconnected the power and turned off the water supply. Then removed the front panel of the washer by removing the two phillips head screws from the lower left and right front of the machine. I then removed the four hex screws at the corners of the top of the machine using a socket set. The two screws in the front of the top come out through the inside and the two screws in the back come out through the access holes in the top. Next I disconnected the bleach/softener tube from the upper end to allow the lid to be raised. Then I swung the right hand side of the lid up fully and rested it on the left hand side support using the braces provided on the lid and resting the weight on the attached support string. The injector valve, inector nozzle and injector bracket are right on top on the left hand side. The bracket is taken out by removing one hex screw on the underside of the bracket. The valve and nozzle are removed by loosening the hex screw on the hose clamp, To replace, first assemble the rubber sleeve and plastic injector. The large end of the plastic injector should fit squarely into the slot of the rubber sleeve. To insert this assembly back into the molded end of the injector hose I used a small amout of laundry detergent to lubricate the large end of the rubber sleeve. This allowed the part to slide in without displacing the rubber sleeve from the plastic injector nozzle. Now, I replaced the associated parts (lid and front panel) and turned the water on and plugged the washer back in. No more leak. Thanks to PartSelect.com my repair was easy. I did not need to replace the injector sleeve bracket but purchased the new one in case I broke the old one during the repair.
Removed front of machine; then tilted back the top of machine, after removing the two screws in top front. Removed the old parts, trimmed the injector hose which was slightly longer than necessary, put new injector nozzle in ruber injector valve and inserted into the new sleeve, clamping the new hose to sleeve as well as clamping the remaining functioning hose to sleeve. The new sleeve mounting bracket was slightly different from the old one, but I was able to make it work with a small block of wood and two screws. The washing macine no longer leaks, the parts arrived timely, and the price was right. Thanks.
I took the front panel off the machine and then removed the two screws that held the top on. Cut the hose clamps off the hoses and replace the injector sleeve, valve, housing, and hose to tub. I am not sure what the function of this is, other than to inject air into the water before it goes into the tub. Very easy to do if you know how to open up the washing machine.
This clothes washer is 35 years old and runs like a champ. I did notice a bit of water below the left rear and assumed that a hose was leaking. I let it go for about 6 months, until I could fit it into the "to-do" list. During that time, the hot/cold water intake valve died. I ordered the replacement hot/cold valve a month ago but noticed, upon removal of the valve, that there was significant water drip evidence around the electrical valve solenoids. The water drips caused the valve to die. Drips came from a clogged injector hose air break directly above the valve. Replaced all hoses and water level vacuum air line. Very easy process. The front drops off with two screws. The lid is off with two screws. All hoses easy to R/R. It took about 2 hours to complete. All replacement parts were perfect. My belts are fine so I'm ready for another 30 years of service.
Nutdriver, Pliers, Screw drivers, Socket set, Wrench set
17 of 20 peoplefound this instruction helpful.
Was this instruction helpful to you?
Thank you for voting!
Leaking water
The washer leaked only when i used warm or hot water. I found that the rubber injector valve would get to soft when using hot water,allowing the water to leak through and bubble out and onto the floor. I went ahead and replaced the injector nozzle, injector sleeve and the rubber injector valve. I ordered the parts monday morning and they arrived the next day. Excellent service.
After reading the description of the problem and finding the source of the leak I decided to buy the parts suggested. To begin: 1. Unplug and turn off water valves at the wall. 2. Unscrew the two front phillips head screws that hold the front of the machine on. Pull off the front facing panel of the washer. 3. There are two hex head screws that hold the lid on. Remove these and then the lid can be lifted to see the nozzle and the valve. 4. Unscrew the pipe clamp that hold the valve on to the pipe. 5. Take out the old valve and nozzle. 6. Use water or soap to lubricate the nozzle and valve before replacing. 7. Install the new parts and reinstall the pipe clamp. 8. Replace the lid and the screws. 9. Replace the face cover and the screws. 10. Plug in the machine and turn on the valves and test.
I tested the machine and thought I could save the water and run another cycle later. This is a bad idea. The water fills up and over the top when a new cycle is added because there is no water level sensor. If you decide to test it and need to empty the water instead of wash a load you can turn the dial to spin and it will drain your test water. Best
Ask our experts a question about this part and we'll get back to you as soon as possible!
5 questions answered by our experts.
< Prev
1
Next >
Sort by:
Search filter:
Clear Filter
Your search term must have 3 or more characters.
Keep searches simple. Use keywords, e.g. "leaking", "pump", "broken" or "fit".
Sorry, we couldn't find any existing answers that matched.Try using some different or simpler keywords, or submit your new question by using the "Ask a Question" button above!
Joel
December 10, 2017
Hi, i would like to order these two parts: Wp213015 and Wp216201. The plastic injector and the valve. Would this be the correct parts to go with this model
For model number A882
Hi Joel,
Thank you for your question. Yes, both of those parts are listed underneath your model information as compatible parts. Good luck with your repair.
19 people found this helpful.
Was this helpful?
Thank you for voting!
Tom
December 7, 2019
What is the function of this injector? Partselect number ps11738945 will my washer be damaged if replace it with a piece of tubing?
Hi Tom, this part is commonly known to cause a leak at the top left corner of the outer tub. It fits over the injector nozzle. I would not recommend diy solutions. Thank you for your question and good luck with your repair!
3 people found this helpful.
Was this helpful?
Thank you for voting!
Reg
June 27, 2021
I would like to replace both the injector valve and the rubber hose the injector valve fits inside of, on my Maytag A412 washer. Can you give me the correct part numbers that I need? Also the switch when you open and close the lid needs to be replaced.
For model number A412
Hello Reg, Thank you for contacting us. We have researched the model you have provided and have found the part you are looking for is PartSelect Number PS1583805 for the Valve, PS11738877 for the Hose and PS11723153 for the Lid Switch. We hope this helps!
I need parts numbers for rubber injector valve and plastic gut piece.Thank you.
For model number LAT9400AAL
Hi Joe,
Thank you for your question. The part number listed under your model number for the rubber injector valve is PS11738945 and the part number for plastic injector nozzle is PS11738878. If you would like to place an order for the parts, you may order them either online or by calling our customer service line and anyone will be happy to assist you. We hope this helps! If you have any questions, please let us know.
1 person found this helpful.
Was this helpful?
Thank you for voting!
Kathy
November 1, 2021
Please give me the parts numbers for both the rubber valve and the injector? Thank you. It’s an A506 model.
For model number A506
Hello Kathy, Thank you for contacting us. We have researched the model you have provided and have found the part you are looking for is PartSelect Number: PS11738945 for the Rubber Injector Valve. The PartSelect Number PS11739774 is the Injector Sleeve Bracket - Side Mounting. Part #: PS11738878 for the Plastic Injector Nozzle and Part #: PS11738785 for the full Assembly with Hose. We hope this helps!