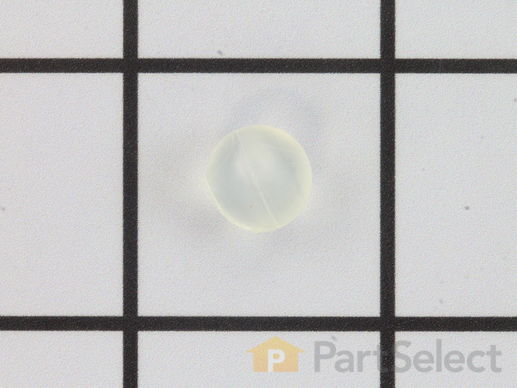
Part Location Diagram of WP211726 Whirlpool Washing Machine Lid Hinge Ball
See part 5 in the diagram
Replacing your Maytag Washer Washing Machine Lid Hinge Ball
( Grid squares measure 1x1 inch )
Customer Service Representative

Get in touch, we're here to help!

Monday to Saturday
8am - 9pm EST

customerservice@partselect.ca

Washing Machine Lid Hinge Ball

★★★★★
★★★★★
1 Review
$14.16
  In Stock

Get this part fast! Average delivery time for in-stock parts via standard shipping: 1.8 days.

PartSelect Number PS11738871
Manufacturer Part Number WP211726
Manufactured by Whirlpool
Product Description

Washing Machine Lid Hinge Ball Specifications

This washing machine lid hinge ball is well under an inch in diameter. These hinge balls are sold separately, though two are required per lid. This lid hinge ball is made of plastic and is used for Maytag brand washing machines.
How Buying OEM Parts Can Save You Time and Money

How Buying OEM Parts Can Save You Time and Money

Part Videos

Replacing your Maytag Washer Washing Machine Lid Hinge Ball

Replacing your Maytag Washer Washing Machine Lid Hinge Ball
Troubleshooting
This part fixes the following symptoms:
Lid or door won’t close | Will Not Start
This part works with the following products:
Washer.
This part works with the following products:
Maytag, International.
Part# WP211726 replaces these:
AP6005811, 2-11726, 211726, 83-726, J28-811
Back to Top
Customer Reviews
Average Rating:
★★★★★
★★★★★
1 Review
5.0
Filter By Rating:
  • 5 Stars
    1
  • 4 Stars
    0
  • 3 Stars
    0
  • 2 Stars
    0
  • 1 Star
    0
  • 1
Sort by:
Sorry, we couldn't find any existing reviews that matched. Try using some different or simpler keywords.
  • 1
Customer Repair Stories
 Average Repair Rating: 4.3 / 5.0, 8 reviews. What's this?
  • 1
Sort by:
Sorry, we couldn't find any existing installation instruction that matched.
washing machine lid came off during a move
First, I secured one lid hinge ball in its appropriate position between the lid and the washer. While keeping the first ball in place I placed the other lid hinge ball as close to its intended position as I could get it. Next, I pushed the lid and ball into its position.
Other Parts Used:
  • David from New Orleans, LA
  • Difficulty Level:
    Really Easy
  • Total Repair Time:
    Less than 15 mins
30 of 36 people found this instruction helpful.
Was this instruction helpful to you?
Thank you for voting!
washer dead after unbalanced load
Unplugged washer, turned off water supply,Removed the screws in back of console. removed. back plate, unplugged lid switch from console. removed screws holding console to frame of machine. Removed lid by prying the bottom corners out freeing the hinge ball on either side. unscrewed the lid switch from the frame of machine. installed the new plunger screwed into place aligned with lid switch snapped new switch in place, plugged in to console. put screws back into console and put back plate back on turn water supply on plugged in washer started washer which is now working . and the repair guy who never showed up wanted to charge me 50. diagnostic fee when I told him itwas the switch. it cost me less than 50 for all the parts. if you can read you can do
Other Parts Used:
Unbalance Lever and Lid Switch Actuator Assembly Lid Switch Assembly
  • SUZANNE from MODESTO, CA
  • Difficulty Level:
    A Bit Difficult
  • Total Repair Time:
    15 - 30 mins
  • Tools:
    Nutdriver, Screw drivers
24 of 32 people found this instruction helpful.
Was this instruction helpful to you?
Thank you for voting!
When Filling Tub To Soak, Water Leaked From Left Rear Corner
Removed front cover by removal of 2 phillips screws at bottom of front panel. Removed two cap screws from lf and rf corners attaching the top to the side panels. Raised and blocked up with piece of wood the hinged top of machine. Removed hose clamps with nut driver and cotter pin remover to expand the maytag clamps for reuse and to break the stick of the hoses to the old sleeve. Removed the clamp at the water fill valve on the water hose run up to the sleeve. Removed the water injector from the washer fill hose and removed the plastic injector for reuse in the injector hose. Inserted it into the fill hose as the old removed sample revealed. Installed the new improved plastic sleeve with one of two original screws, no longer using two but one screw for mounting. Installed original clamps on new hoses and reinstalled hoses on new sleeve. Pressed run dial center to start fill to ensure water leak was now cured. Reinstalled lf and rf cap screws to side panels. Reinstalled front panel 2 phillips retaining screws. Tested cycles and no leaks, on this 1966 machine bought new in may of 1966, along with its companion maytag dryer. Both remain in good use. A comparable maytag washer is 799. 00 At lowes. . . Thank you, fred maytag, for the best washer with the easiest design to repair, if it ever needs parts. . . And thanks, partselect. Com for having these 44 year old washing machine parts. Interesting to note that this sleeve not only had an added water fence around its open vent slots to prevent water overflow, but that it now tilted rearward on the oem mount to aid in that desire. It is always good to see american companies that are continually upgrading their parts to work better and to fit in older machines, like maytag has always done, in their search for excellence.
Other Parts Used:
Injector Sleeve Bracket - Side Mounting Rubber Injector Valve Injector Hose
  • EL from O'Fallon, IL
  • Difficulty Level:
    Really Easy
  • Total Repair Time:
    15 - 30 mins
  • Tools:
    Nutdriver, Screw drivers, Socket set
7 of 9 people found this instruction helpful.
Was this instruction helpful to you?
Thank you for voting!
Washing machine lid hinge balls fell off machine lid
First I had to hold the balls into the little holes on the side of the lid - one at a time- and tap the plastic ball into the side with a small hammer. I did the same with the other side. Silde the lid to match the holes located on the washing machine - give a little push to make sure that the balls are in place. You have your lid fixed to your machine where you can lift the lid and it will stay up without falling.

Note: If the balls fall out - make sure to tap a little harder so that the balls stay in place.
Other Parts Used:
  • Sandra L from Warren, OH
  • Difficulty Level:
    Easy
  • Total Repair Time:
    15 - 30 mins
6 of 7 people found this instruction helpful.
Was this instruction helpful to you?
Thank you for voting!
Machine would not operate with lid down.
Disconnected power. Then I removed the cover to the console on the back to gain access to the lid switch. Removed the switch assembly by hand and disconnected from electrical plug on machine. Attached new assembly unit to plug and reinserted new assembly onto machine. Reattached cover to console.
Other Parts Used:
Lid Switch Assembly
  • Edward from Chamblee, GA
  • Difficulty Level:
    Really Easy
  • Total Repair Time:
    Less than 15 mins
  • Tools:
    Screw drivers
5 of 6 people found this instruction helpful.
Was this instruction helpful to you?
Thank you for voting!
Resin balls on which the top loader lid hinges had broken.
Cleaned the cavities. Lubed them with olive oil. Inserted one ball on left side, while holding tension against that side to hold the ball in the lid and top indentations. Applied olive oil to right hand side indentation, and placed the new ball into lid indentation. Put lid down into closure cavity with ball, and with lid vertical, began pushing it rearward so as toslightly spring metal lid rolled edge and top metal away from one another UNTIL the new ball snapped into the hinge indentation in the machine cover. Done.
Other Parts Used:
  • EL from O'Fallon, IL
  • Difficulty Level:
    Easy
  • Total Repair Time:
    Less than 15 mins
5 of 8 people found this instruction helpful.
Was this instruction helpful to you?
Thank you for voting!
Washer fills but would not drain. Pushing the lid switch in and out several times would actuate the switch.
Remove the rear panel covering the control panel. Remove the two screws on each side of the upper control panel. The top removes with gentle (or not so gentle) taps toward the front of the washer. Lift the upper away but be careful of the attached wires. Top must be removed or switch cannot be removed as it cannot pass the cycle selector. Note the wire positions and colors to the switch assembly, remove them, and loosen the screw holding the switch assembly in place. Tilit assembly up like opening a book and lift up and away from the washer being careful of the lid switch actuator below. Replace with new assembly, making sure actuator is positioned to activate switches, and reattach the same screw. Reattach wires to appropriate places, replace top control panel and reattach screws, replace rear panel.
Other Parts Used:
Lid Switch Assembly
  • Dennis from EAST LANSING, MI
  • Difficulty Level:
    Really Easy
  • Total Repair Time:
    30 - 60 mins
  • Tools:
    Nutdriver, Screw drivers
2 of 2 people found this instruction helpful.
Was this instruction helpful to you?
Thank you for voting!
Missing hinge lid ball
Used duct tape as the video provided instructed and also to hold second hinge lid ball in place. Firmly pushed down on the lid until it easily popped in place.
Other Parts Used:
  • Michell from TOOMSUBA, MS
  • Difficulty Level:
    Really Easy
  • Total Repair Time:
    Less than 15 mins
1 of 2 people found this instruction helpful.
Was this instruction helpful to you?
Thank you for voting!
  • 1
Questions and Answers

We're sorry, but our Q&A experts are temporarily unavailable.
Please check back later if you still haven't found the answer you need.

1 question answered by our experts.
  • 1
Sort by:
Sorry, we couldn't find any existing answers that matched.Try using some different or simpler keywords, or submit your new question by using the "Ask a Question" button above!
Thomas
November 25, 2023
Washer shakes violently during spin cycle and moves allover the floor. Is this reparable?
For model number LAT2600AAE
PartSelect logo
Hello Thomas, Thank you for your inquiry. We would recommend checking the leveling legs, the tub damper pads, and the tub balance ring. We hope this helps.

Was this helpful?
Thank you for voting!
Related Parts:
  • 1
Related Parts
Model Cross Reference
This part works with the following models:
PartSelect Number: PS11738871
Manufacturer Part Number: WP211726
Brand
Model Number
Description
Maytag
6329
Washer - MAYTAG AUTOMATIC WASHER
Maytag
6349
Washer - MAYTAG AUTOMATIC WASHER
Maytag
6359
Washer - MAYTAG AUTOMATIC WASHER
Maytag
A102
Washer - Top Loading
Maytag
A102S
Washer - Top Loading
Maytag
A103
Washer - Top Loading
Maytag
A103S
Washer - Top Loading
Maytag
A104
Washer - Top Loading
Maytag
A105
Washer - Top Loading
Maytag
A106
Washer - Top Loading
Maytag
A106S
Washer - Residential
Maytag
A107
Washer - Top Loading
Maytag
A107S
Washer - Residential
Maytag
A108
Washer - Top Loading
Maytag
A108S
Washer - Residential
Maytag
A110
Washer - Top Loading
Maytag
A112
Washer - Top Loading
Maytag
A15CA
Washer
Maytag
A15CM
Washer
Maytag
A15CT
Washer
Maytag
A16CA
Washer
Maytag
A16CM
Washer
Maytag
A16CT
Washer
Maytag
A17CA
Washer
Maytag
A17CM
Washer
Maytag
A17CT
Washer
Maytag
A180
Washer - Top Loading
Maytag
A181
Washer - Top Loading
Maytag
A182
Washer - Top Loading
Maytag
A183
Washer - Top Loading
Customer Service Representative

Get in touch, we're here to help!

Monday to Saturday
8am - 9pm EST

Contact Customer Service