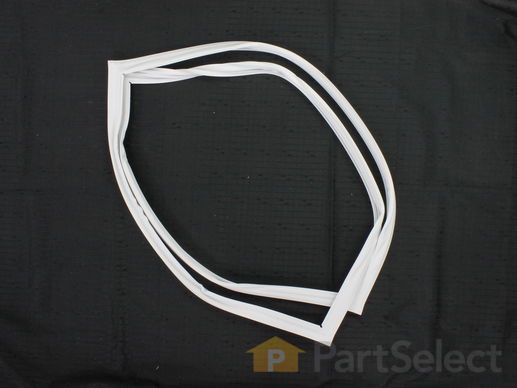
Part Location Diagram of WP12550115Q Whirlpool Refrigerator Door Gasket
See part 91 in the diagram
Replacing your Amana Refrigerator Refrigerator Door Gasket
( Grid squares measure 1x1 inch )
Customer Service Representative

Get in touch, we're here to help!

Daily 8am - 9pm EST

customerservice@partselect.ca

Refrigerator Door Gasket

$162.94
  In Stock

Get this part fast! Average delivery time for in-stock parts via standard shipping: 1.8 days.

PartSelect Number PS11738526
Manufacturer Part Number WP12550115Q
Manufactured by Whirlpool
Product Description

Refrigerator Door Gasket Specifications

This door gasket is white and made of rubber. It measures approximately thirty-one and a half inches wide by thirty-eight and a half inches long.
How Buying OEM Parts Can Save You Time and Money

How Buying OEM Parts Can Save You Time and Money

Part Videos

Replacing your Amana Refrigerator Refrigerator Door Gasket

Replacing your Amana Refrigerator Refrigerator Door Gasket
Troubleshooting
This part fixes the following symptoms:
Door Sweating | Fridge too warm | Door won’t open or close | Fridge runs too long
This part works with the following products:
Refrigerator.
This part works with the following products:
Amana, Whirlpool, KitchenAid, Kenmore.
Part# WP12550115Q replaces these:
AP6005477, 10456809, 10456809Q, 10456837, 10456837Q, 10456859, 10456859Q, 12529015, 12550115, 12550115Q, 4344339, 8170395, 8170508, 8170553, 8170638, 8170676
Back to Top
Customer Repair Stories
 Average Repair Rating: 2.6 / 5.0, 16 reviews. What's this?
  • 1
  • 2
Sort by:
Sorry, we couldn't find any existing installation instruction that matched.
Gaskets deformed, leaking
The pro's esimate was over $500 for this one... It's very helpful to have a power tool screwdriver/nut driver. Loosen up the screws (#8 x 1/2" hex-head screws on mine) which hold the gasket in place. These screws also hold the plastic inner-portion of the refrigerator door in place. On my fridge, the parts of the gasket at the top and bottom closest to the hinge had progressively become deformed, perhaps because the outer part of the plastic was not holding the gasket in place hard enough (in these locations, I improved the clamping action by removing the screw and adding a #10 washer). In many locations, the screws turned out to have been driven in hard enough to strip the metal, so a hardware store run was needed to purchase #10 x 1/2" screws - be warned. Before trying to mount the gasket, I worked it over with a hairdryer on the floor (used an old towel to protect floor), to get out the worst of the kinks, then mounted it on the door, tucking the bead between the inner and outer door all the way around. This can be hard enough that if you do have a power tool nut driver, it may be preferable to completely remove the inner door portion, mount the gasket, then screw it back in place. Once the screws are tightened, use the hairdryer to soften the areas which don't contact properly, working on the gasket with your fingers and/or by repeatedly opening and closing the door, until you have smooth contact all the way around. I did not remove the doors completely, simply stowed the freezer compartment stuff in an ice chest, and used cardboard to close the main refrigerator compartment.
Other Parts Used:
Freezer Door Gasket
  • david from Creve Coeur, MO
  • Difficulty Level:
    A Bit Difficult
  • Total Repair Time:
    1- 2 hours
  • Tools:
    Nutdriver, Screw drivers
47 of 51 people found this instruction helpful.
Was this instruction helpful to you?
Thank you for voting!
The gasket was worn and the freezer door had a poor seal.
I removed all the food items from the door. I removed the old gasket by loosening up the screws at the top of the door. The rest of the old gasket pulled out easily from the rest of the door. While the gasket was off, I took the time to clean up the door. I startede at the top of the door, loosening up the screws but not removing them. I then replaced each side of the door seperately. I found it helpful to have a flat blade to help poke the gasket into place. Because I was in the kitchen, I used a metal spatula. The corners were the trickiest. Using a hand held hair dryer helped to soften the gasket when it became cold. The freezer and fridge have good seals now and the refrigerator is good as new.
Other Parts Used:
Freezer Door Gasket
  • Kay from Nashville, IN
  • Difficulty Level:
    A Bit Difficult
  • Total Repair Time:
    1- 2 hours
  • Tools:
    Socket set
21 of 23 people found this instruction helpful.
Was this instruction helpful to you?
Thank you for voting!
Fridge in great shape, except door seal/gasket.
The fridge is in great shape but the seals/gaskets were shot. Between me, the wife and the kids the fridge door seemed like it was in constant motion.

Measue the seals, NOT THE DOOR. I measued from the straightest part of the seal at the edges and came within an quarter of an inch of what was offered here.

You have to take the seal off in stages, if you loosen all of the screws, the door will fall apart. Pick an edge (I started at the top) undo all of the screws and pull the old gasket off.

Then put the new gasket on the top (loosen a couple of screws on the sides if you can't get it to fit) and use a putty knife or a dull butter knife to sit it in place.

Once the top is in, screw the top screws back in and then take out the screws on the next side that you will work on. Go around the rest of the door the same way.

This is not a hard job, but it does have a pain in the rear factor. You have to move quick, especially on the freezer, but once you get the hang of it , it gets easy. But until you get the hang of it, you will be using some four letter words:)

I hope it extends the life of my fridge by another five years, so it is worth the money if the fridge is expensive. It will probably cost $100 or so for 2 seals (in my case a fride and a freezer seal), so if your fridge isn't worth the cost, you would probably be better off replacing the entire fridge.
Other Parts Used:
  • martin from philadelphia, PA
  • Difficulty Level:
    A Bit Difficult
  • Total Repair Time:
    1- 2 hours
  • Tools:
    Nutdriver
20 of 22 people found this instruction helpful.
Was this instruction helpful to you?
Thank you for voting!
Door Gaskets askewed and needed replaced
I hired someone to do this, but after watching him do it, this is an easy job. Amana made a smart refrigerator and it's easy to do your self. I saved a LOT of money buying the parts here and I should have attempted it myself. The trick is heating up the gasket once it was mounted and then when you had a tight seal to the door, tape the door shut and LEAVE it as many hours as you can (minimum of 4, but overnight better).
Other Parts Used:
Freezer Door Gasket
  • Lin from Anchorage, AK
  • Difficulty Level:
    Really Easy
  • Total Repair Time:
    More than 2 hours
  • Tools:
    Nutdriver, Screw drivers
10 of 10 people found this instruction helpful.
Was this instruction helpful to you?
Thank you for voting!
door seals were badly distorted and did not seal in cold temperatures very well
I removes all food and drink items from the refrigerator and freezer doors. I then removed all of the screws holding the inner panel of the refrigerator door to the door itself. The old gasket could then be removed. I placed the new door gasket in place around the inner panel and reinstalled the inner panel with new gasket onto the refrigerator door. I then removed the inner panel from the freezer door and then removed the old gasket. I placed the new door gasket in place around the inner panel and reinstalled the inner panel with new gasket onto the freezer door. I used a portable drill with a 1/4 inch nut driver to remove and reinstall the many screws that held the inner panel and gasket on the doors.
Other Parts Used:
Freezer Door Gasket
  • victor from cheektowaga, NY
  • Difficulty Level:
    A Bit Difficult
  • Total Repair Time:
    30 - 60 mins
  • Tools:
    Nutdriver
8 of 9 people found this instruction helpful.
Was this instruction helpful to you?
Thank you for voting!
the seal on the gaskets were broken
Soaked the gaskets in bathtub to make them more pliable. They laid flatter and were easier towork with,
Other Parts Used:
Freezer Door Gasket
  • Barbara S. from Hendersonville, TN
  • Difficulty Level:
    A Bit Difficult
  • Total Repair Time:
    More than 2 hours
  • Tools:
    Screw drivers
7 of 7 people found this instruction helpful.
Was this instruction helpful to you?
Thank you for voting!
gaskets ripped on freezer/refridge.poor seal.
I removed all food items from inside fridge/freezer doors.I then noticed how gaskets slip behind outter skin of both doors after removing all screws except a few on the top, inorder to keep from having entire door skin fall to the floor.Using back of spoon helps to properly fit gaskets into place without any rips.Using nut driver really helps with saving time and the "hairdryer" suggestion really helps with having gasket seat firmly around entire unit.Just take your time and pay attention to corners,they may need a little streching.
Other Parts Used:
Freezer Door Gasket
  • John from Levittown, NY
  • Difficulty Level:
    Easy
  • Total Repair Time:
    30 - 60 mins
  • Tools:
    Nutdriver
4 of 5 people found this instruction helpful.
Was this instruction helpful to you?
Thank you for voting!
Lower hinge side gasket deformed over time not providing adequate seal.
Refrigerator door was removed and placed on a set of "horses". Fastners were loosened about 3/4 thread length. Old gasket removed. New one installed. It was necessary to use a "hair dryer" to take out shipping kninks.
Used a piece of 1 1/2 inch sheet styrofoam to seal the door
opening during the process so as not requiring emptying the
unit.

The freezer door was a bit more difficult. This one was done in place. The Styrofoam sheet was cut down and fit in this opening as mentioned above. Inner door panel was removed to reveal heavy ice build up inside door. This was allow to melt and removed along with the fiberglass insulation. New fiberglass insulation was installed and the door reassembled.

In general everything went quite smoothly. Fit on both gaskets was really good.
Other Parts Used:
Freezer Door Gasket
  • Robert from Chardon, OH
  • Difficulty Level:
    Really Easy
  • Total Repair Time:
    1- 2 hours
  • Tools:
    Nutdriver, Screw drivers, Socket set
4 of 6 people found this instruction helpful.
Was this instruction helpful to you?
Thank you for voting!
Refridgerator needed new gaskets
Loosen bolts, remove gasket. Replace gaskets then tighten bolts.
The gaskets new were very out of shape when they were delivered this made it very difficult to put them back on. Even after warming them up with the hair dryer.
Other Parts Used:
Freezer Door Gasket
  • Sandra from Wooster, OH
  • Difficulty Level:
    Difficult
  • Total Repair Time:
    More than 2 hours
  • Tools:
    Nutdriver
3 of 3 people found this instruction helpful.
Was this instruction helpful to you?
Thank you for voting!
Gaskets were damaged
Followed the video instruction and it was fairly easy to install. Let the gaskets sit for a day to reshape itself. Started by loosening the screws then removal of the gasket was done. The only hard part was to align the Gasket evenly. Not removing the doors made the install a little more difficult for alignment.
Other Parts Used:
Freezer Door Gasket
  • MARVIN from EL CERRITO, CA
  • Difficulty Level:
    Really Easy
  • Total Repair Time:
    1- 2 hours
  • Tools:
    Nutdriver
2 of 2 people found this instruction helpful.
Was this instruction helpful to you?
Thank you for voting!
  • 1
  • 2
Questions and Answers

Be the first to ask our experts a question about this part!

Related Parts
Model Cross Reference
This part works with the following models:
PartSelect Number: PS11738526
Manufacturer Part Number: WP12550115Q
Brand
Model Number
Description
Amana
59661102100
Refrigerator
Amana
59661102101
Refrigerator
Amana
59661103100
Refrigerator
Amana
59661103101
Refrigerator
Amana
59661104100
Refrigerator
Amana
59661104101
Refrigerator
Amana
59661109100
Refrigerator
Amana
59661109101
Refrigerator
Amana
59661142100
Refrigerator
Amana
59661142101
Refrigerator
Amana
59661144100
Refrigerator
Amana
59661144101
Refrigerator
Amana
59661152100
Refrigerator
Amana
59661152101
Refrigerator
Amana
59661154100
Refrigerator
Amana
59661154101
Refrigerator
Amana
59661162100
Refrigerator
Amana
59661162101
Refrigerator
Amana
59661164100
Refrigerator
Amana
59661164101
Refrigerator
Amana
59661272100
Refrigerator
Amana
59661272101
Refrigerator
Amana
59661273100
Refrigerator
Amana
59661273101
Refrigerator
Amana
59661274100
Refrigerator
Amana
59661274101
Refrigerator
Amana
59661279100
Refrigerator
Amana
59661279101
Refrigerator
Amana
59661282100
Refrigerator
Amana
59661282101
Refrigerator
Customer Service Representative

Get in touch, we're here to help!

Daily 8am - 9pm EST

Contact Customer Service