The idler pulley wheel is now sold with this arm. This idler pulley is for dryers.
Idler pulley maintains correct tension on the drive belt to spin the drum.
How Buying OEM Parts Can Save You Time and Money
Part Videos
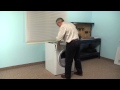
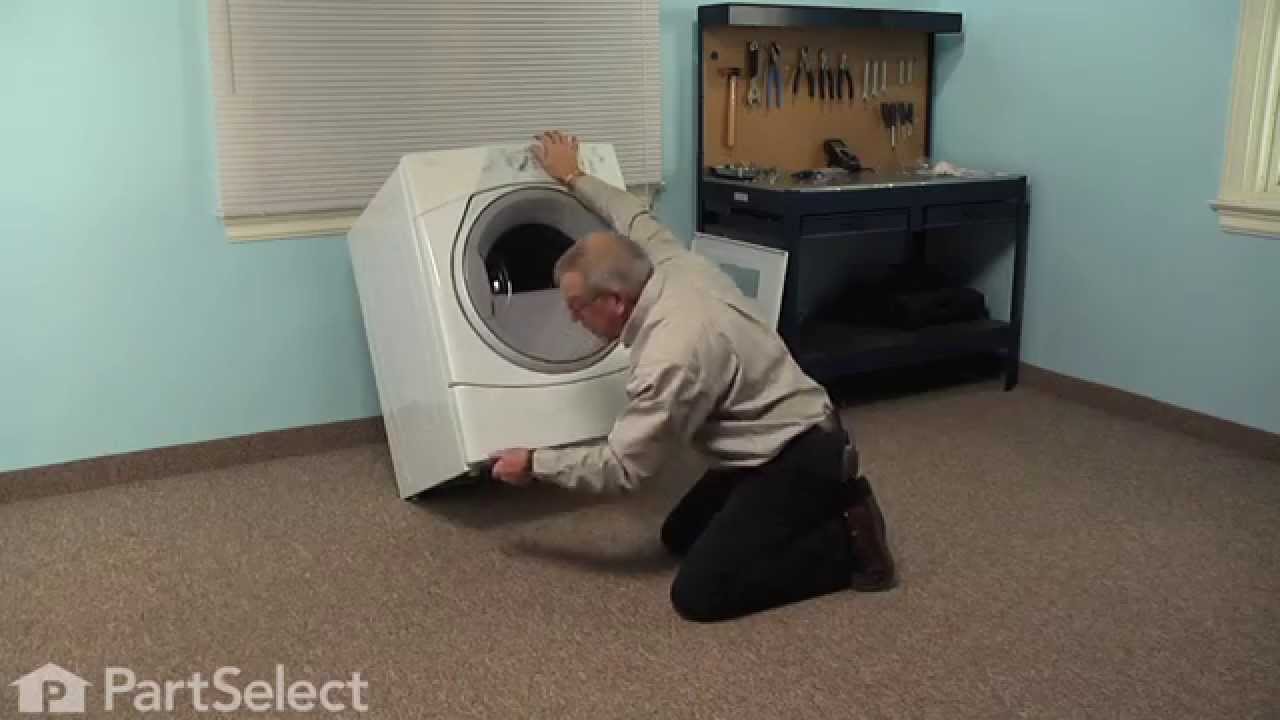
Replacing your Whirlpool Dryer Idler Pulley with Bracket
Easy website to find parts and order from plus unbelievably fast delivery of pulley which was easy to install and worked perfectly!
★★★★★
★★★★★
Clancy H - January 8, 2024
Verified Purchase
GREAT Part, easy to unstall
The part was un excellent condition. Ship very fast considering where I am in Northern Canada.. fixed my problem perfectly.. bearing on old pulley was worn causing loud screeching noise when dryer was turning..Thanks so much.
★★★★★
★★★★★
Jeff C - August 30, 2023
Verified Purchase
Easy repair
Arrived within 5 days and the dryer was back up and running in no time
★★★★★
★★★★★
Michael B - March 26, 2023
Verified Purchase
Quick and easy
Fit perfect. No issues. I have been using parts select for some years now and have had no issues with anything I have ordered. This is my go to place for all my home appliances.
★★★★★
★★★★★
KEVIN S - March 18, 2023
Verified Purchase
Easy repair.
Part worked perfect. Fixed the squeak. Was able to install it from the back of the dryer. . Did not need to take apart the front or take the drum out.
★★★★★
★★★★★
Jason G - February 25, 2023
Verified Purchase
Correct part & delivered fast
They provided a perfect match for the part that I needed to replace. The diagrams and parts list made it easy to figure out what I needed.
★★★★★
★★★★★
Julie L - August 7, 2022
Verified Purchase
Easy installation
Good, problem solved!
★★★★★
★★★★★
Brian R - May 5, 2022
Verified Purchase
Correct part for my Kenmore elite electric dryer
The part did what I wanted never fun to change this part but this part installed correctly and the belt fitted perfectly. For certain Kenmore/Whirlpool dryers it must be the exact part and this one was Whirlpool Certified and Made in the US.
★★★★★
★★★★★
Luke W - April 17, 2022
Verified Purchase
Good service
Part was shipped promptly and arrived in a week, got my dryer back up and running right away.
< Prev
1
2
3
Next >
Customer Repair Stories
Average Repair Rating: 3.7 / 5.0, 15 reviews.
What's this?
< Prev
1
2
Next >
Sort by:
Search filter:
Clear Filter
Your search term must have 3 or more characters.
Keep searches simple. Use keywords, e.g. "leaking", "pump", "broken" or "fit".
Sorry, we couldn't find any existing installation instruction that matched.
Insanely loud squeaking
With the correct parts and watching the video, it was so easy to repair. We ordered the wrong part (for the Electric Dryer when it should have been for the Residential Dryer) but the return was easy and we got the new parts super fast. Next time I would probably look at the offending part first before ordering just to make certain. But we used a socket set and Philips screwdriver and actually had our teens do all the work for experience. Fixed the loud noise one and for all.
Dryer starts with loud squeak initially. Eventually there was a loud clank and dryer stopped.
Rather than remove the front panels, door, control panel and drum, I noticed 1/4" metal screws on the back panel. There were approximately 6 holding the back panel in place. I did have to remove the top panel as well before removing the back. Once removed I had complete access to the broken idler pulley assembly. I immediately saw the broken pulley. I installed the new one with very little effort. Reset the belt according to instructions from the video. Reassembled, plugged in, hit start and enjoyed the sweet sounds of success. All told it took me about 20 minutes from start to finish.
Dryer made a terrible screeching noise when tumbling.
I followed the repair Vedic and took the drum out and replaced the pulls and bracket. Very straightforward job. Dryer is now as quite as the first day we bought it.
Other Parts Used:
Richard from SAUGERTIES, NY
Difficulty Level:
A Bit Difficult
Total Repair Time:
30 - 60 mins
Tools:
Nutdriver, Screw drivers, Socket set
8 of 8 peoplefound this instruction helpful.
Was this instruction helpful to you?
Thank you for voting!
Idler pulley wore out
Removed the back panel and saw that the idler pulley was worn out. It only took me 5min. To replace, it was very easy to replace.
Other Parts Used:
Peter from HUEYTOWN, AL
Difficulty Level:
Very Easy
Total Repair Time:
15 - 30 mins
Tools:
Screw drivers, Socket set
7 of 8 peoplefound this instruction helpful.
Was this instruction helpful to you?
Thank you for voting!
My idler pully was squealing
I removed the bottom access panel, with 2 hands i reached in behind the blower, i released the belt, i used a screwdriver to pop the retainer from the pully spindle, i removed and replaced the pully, i snapped the retainer back on and replaced the belt. I made sure the belt was on track and all was good. I put the bottom panel back on, it took all of 5 minutes. The hardest part was the retainer clip faces the rear of the dryer so you have to feel it. Also , the space is tight, use a smaller flathead screwdriver to get behind the clip, it will pop right off.
Other Parts Used:
Anthony from SAINT CLOUD, FL
Difficulty Level:
Really Easy
Total Repair Time:
Less than 15 mins
Tools:
Screw drivers
4 of 5 peoplefound this instruction helpful.
Was this instruction helpful to you?
Thank you for voting!
Loud squealing when the dryer was running...especially on start up.
Simply followed the video that accompanied the part confirmation. Removed the top and front of the dryer. Removed the drum and belt. Unbolted (1 bolt) the Idler pulley and bracket and bolted on the new one. Reversed the sequence of disassembly and tried it out. The only minor difficulty was slipping the belt over the idler pulley after the drum was in place. This is where a second set of hands might be helpful to hold up the drum, while the other person puts the belt in place. Other than that, this was a simple repair and probably saved a couple hundred dollars for about 1.5 hours of my time. Thanks for the video...it was right on point, and made the job much easier.
Other Parts Used:
Anthony from GROVELAND, IL
Difficulty Level:
Really Easy
Total Repair Time:
1- 2 hours
Tools:
Nutdriver, Screw drivers
4 of 5 peoplefound this instruction helpful.
Was this instruction helpful to you?
Thank you for voting!
Dryer was very loud and sounded like it was scraping
Took the back and top off of my front loader. I had checked on you tube for the problem and how to fix it and ordered the part. Just followed the directions on how to remove the old idle pulley and installing the new one. Dryer runs like new!
Other Parts Used:
Annde from JEFFERSON CTY, TN
Difficulty Level:
Really Easy
Total Repair Time:
15 - 30 mins
Tools:
Pliers, Screw drivers, Wrench (Adjustable)
3 of 3 peoplefound this instruction helpful.
Was this instruction helpful to you?
Thank you for voting!
Intermittent squealing sound while dryer running
Take pictures along the way. 1. Remove lower front panel using screwdriver to lift up on tabs on top of panel. 2. remove door 3. unplug moisture sensor plugs 4. remove lint trap 5. on back of dryer, remove screws holding upper lid 6. slid up lid forward just a small amount, its hooked in towards the front of the upper lid. you will need to do this so you can can remove two screws under the lid holding the front panel of the dryer on 7. remove the front panel screws mentioned in step 6. 8. Remove lower front panel screws 9. remove front panel 10. reach into dryer at the bottom and release tension from belt pulley, sliding the belt off. (make a note of how the belt is routed around the drive and idler pulleys) 11. slide out tumbling drum 12. with drum removed, use socket wrench and socket to remove old idler pulley. 13. install new idler pulley 14. reinstall tumbling drum 15. slide belt back around tumbling drum, looping belt around drive pulley and around idler pulley. 16. When belt is installed, rotate drum a few revolutions to ensure belt rides correctly. 17. Reinstall front panel 18 slide top panel back into place and secure with screws from back 19. reinstall door 20. reattach moisture sensor plugs 21. reinstall lower panel
The pulley is accessible from the back of the dryer. Disconnect the gas line. Remove all the screws. Also remove the small plate that secures the line cord. Lift the back up and out. I was able to avoid disconnecting the water line. Take a picture of the pulley so that you will have a record of the belt routing. Release the spring and remove and replace the pulley and bracket. Vacuum out the lint. Plug in the dryer to make sure that it works properly before reassembly.
Other Parts Used:
John from CREST HILL, IL
Difficulty Level:
Easy
Total Repair Time:
30 - 60 mins
Tools:
Nutdriver, Pliers
2 of 2 peoplefound this instruction helpful.
Was this instruction helpful to you?
Thank you for voting!
< Prev
1
2
Next >
Questions and Answers
Ask our experts a question about this part and we'll get back to you as soon as possible!
2 questions answered by our experts.
< Prev
1
Next >
Sort by:
Search filter:
Clear Filter
Your search term must have 3 or more characters.
Keep searches simple. Use keywords, e.g. "leaking", "pump", "broken" or "fit".
Sorry, we couldn't find any existing answers that matched.Try using some different or simpler keywords, or submit your new question by using the "Ask a Question" button above!
Dan
February 18, 2023
My dryer wouldn't or would barely tumble. I took the back panel off and had a look at the motor and belts ect. With the dryer on, I could hear the motor running, but nothing was moving/spinning. I pulled the tension arm, increasing the tension, and when I released it, everything started working as it should... for about a week. Took it apart again and the same deal. What's worn out? What parts do I need?
For model number Wed94hexw1
Hello Dan, thank you for your inquiry. Based on the information provided, we recommend replacing several items that can be found in the Dryer Repair Kit PS373088. This dryer repair kit contains a multi rib dryer belt, 4 drum support rollers, 1 idler assembly, 9 tri rings, and 1 washer. We also have a video for your view for installation information. We hope to hear from you soon.
As a temporary fix, will wd40 stop a squealing idler?
For model number Ymede250xl0
Hi Larry, thank you for the great question. WD-40 only protects metal from rust and corrosion, penetrates stuck parts, displaces moisture, and lubricates almost anything, so it may provide a temporary solution. For squealing sounds, it is advised to look for any wear on the idler pulley. If you come across scoring marks, then it is one of the signs of a bad idler pulley. We recommend you replace the idler pulley, part number PS334244, since a worn-out idler pulley may damage the drive belt if used for longer durations. We hope this information helps!
This Idler Pulley includes the tri-ring and gasket and everything included here is manufacturer-certified. This part maintains correct tension on the drive belt in order to spin the drum properly. If damaged or broken th...
The Drive Belt is a 93 1/2" belt which wraps around the dryer drum to allow tension and movement. If broken the dryer will not turn properly, or there may be loud noises. The part is rated as "medium" difficulty to insta...
Model Cross Reference
This part works with the following models:
PartSelect Number: PS11726337
Manufacturer Part Number: W10837240