This tub bearing is for washers.
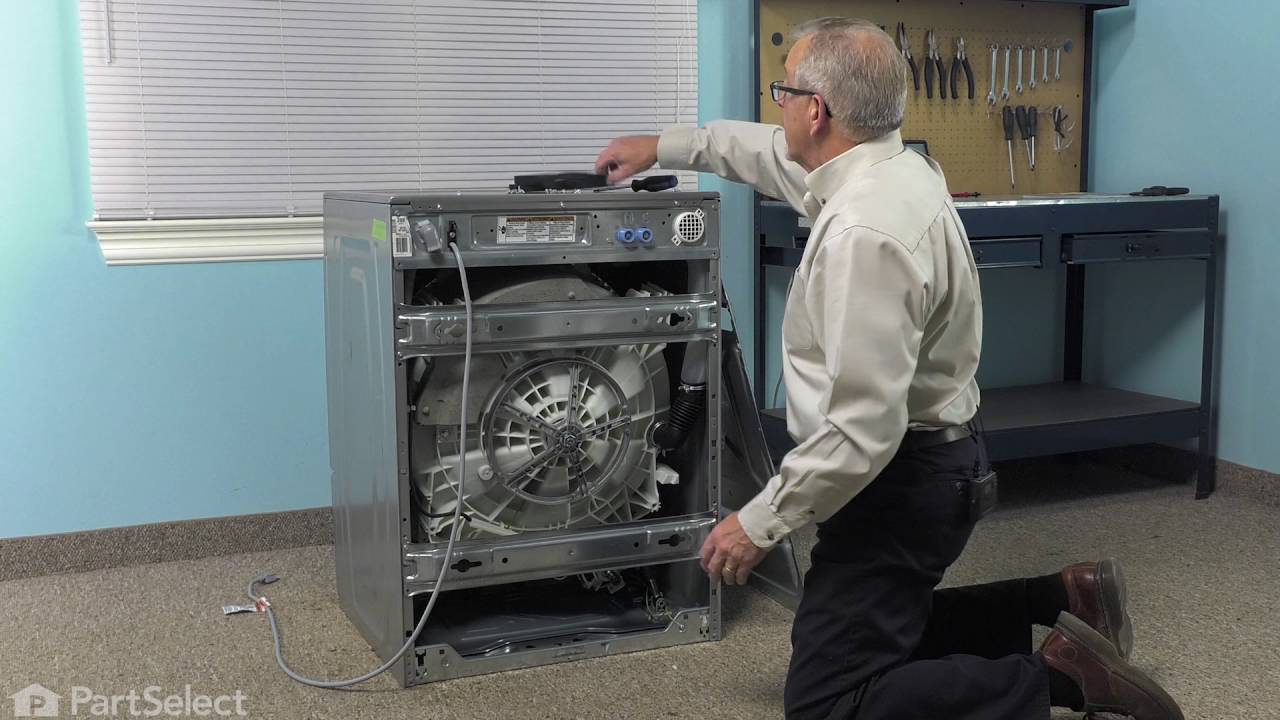
Tub bearing supports the spin basket shaft at the tub.
Unplug the washer and shut off the water supply before installing this part. Wear work gloves to protect your hands.
How Buying OEM Parts Can Save You Time and Money
Troubleshooting
This part fixes the following symptoms:
Noisy and Marks Left on Clothes
This part works with the following products:
Washer.
This part works with the following products:
LG.
Part# MAP61913707 replaces these:
4280FR4048E, 4280FR4048V
Customer Repair Stories
Average Repair Rating: 2.5 / 5.0, 9 reviews.
What's this?
< Prev
1
Next >
Sort by:
Search filter:
Clear Filter
Your search term must have 3 or more characters.
Keep searches simple. Use keywords, e.g. "leaking", "pump", "broken" or "fit".
Sorry, we couldn't find any existing installation instruction that matched.
Dry bearing noise, rough bearing, very loud in spin cycle
I went online and looked at the different parts companies for this brand of washer. This is an LG Tromm steam washer. I am pretty mechanically inclined so I watched videos on this machine which you can also find on line and U-Tube and took down some notes that I felt relevant for the disassembly and the repair. I looked at the break down parts schematics and ordered all the parts I felt I needed for this machine. The parts I ordered were the tub hub seal and the inner and outer bearings that go on the spindle shaft which is connected to a piece they call the spider that connects to the inner tub. I also ordered the outer tub o-ring where the outer tub splits in half. Note that I mentioned the spider and that they have a tendency to corrode bad, but you cannot see it until it is disassembled, the parts I ordered are reasonable, the spider can cost upwards of a hundred plus dollars so make sure you evaluate the cost of parts to the age of your machine and to the cost of a new one. Well on my front load washer when I finally took it apart and I felt I got lucky with just the two spindle hub bearings and the seal and the outer tube seal. After looking at the videos and taking some notes, written and mental, I started the disassembly of the washer. First " unplug the power to the washer". the next step is to shut off your two water supplies to the washer and disconnect the hot and cold water lines, note that I disconnected the lines at the washer just for the convenience of not having those lines hanging off the machine and out of your way. another note is that you will want an area with some space so you can keep everything organized and give yourself some room to work. Once you have your machine moved to a open space, start by removing the top of the machine. there are two screws, 4 total in the back of the cover that are removed with a plastic bracket on each side, these are Phillips head or cross type screws. once removed, take the top and shift it back about 1 to 1.5 inches, you then can lift the top off and out of the way. The next step is to remove the front control panel by starting with the wire connectors that go into the control panel. Each connecter is different so there is no mix up. next is to remove your soap dispenser tray, on top of the tray about in the center towards the back is a spot that you gently push down on and this will release the tray for removal and move it out of the way. There are two Phillip screws on each side where you removed the tray that need to be removed to be able to remove the dispenser section out of the way. there are hoses connected to the dispenser but once lifted up an out you can lay the dispenser with the hoses connected over towards the back. There is a large rubberized hose connection that needs to be removed which has a clamp on it that you need to loosen up to take loose the connection. back to the front control panel there is one more screw on the back side on the right side looking at the front that must be removed then the front control panel assembly can be removed. there are some plastic clips on the control panels back side that need undone, gently and be careful not to force these clips but slightly lift up on the rear of the control panel and it should come out of there and then set the control panel aside. There are I believe 6 screws on the top of the front door panel assembly that need removed but before you do that down on the left bottom corner you have a panel door which pops open then is easily removed out of the way. there is a small rubber line with a plug in the end of it which can be pulled a little ways. Get a container that is low profile and pull the plug on the hose and direct it into the container, you may or may not get any water out of it, it is the tub drain. reinstall plug when done and put line back in place. Next take the pump screen out by unscrewing it out counter clockwise like a bolt, it is about 1.5 inches in diameter, you may want to put a small towel down in front of it because you will usually get a little water out of it. Once removed, inspect the plastic screen for any debri and remove it and reinstall the screen. Now down in that same area below the screen there is a Phillips screw which needs to be removed and set aside. Now you go to the rubber boot behind the washer door when the door is open on the outer edge there is a metal wire that goes around the boot to hold it in place with a spring on it. You want to gently take a flat blade screw driver and not to tear the boot, work that wire and spring out of its groove and remove it out of the way. now you may take the rubber boot on the front and take it off its edge and push it back in towards the tub. Now we go back to the six screws at the top of the panel and remove them. at this time you should be able to lean the panel out enough to disconnect the wires to the door latch. Once the door latch has been disconnected, lift up on the front door panel and bring it out
as expected, the rear bearings were GONE!.. hard part was removing the inner tub from the outer one. hint... put the bolt in the shaft, tighten and pond the crap out of it ... takes time but the tub will come out, after that it's easy
Followed the step-by-step video, you end up taking most of the washer apart. Got the drum out & apart, then ran into a wall with the bearings. Couldn't get them out - acted like the housings were frozen. Took all the pieces of the washer to the curb for garbage pickup. I never opened the replacement parts and will be returning them.
Loud grinding noise, especially during the spin cycle.
First I watched several videos on YouTube, numerous times. When I started to disassemble the washer, I put the parts I removed on the floor in the work area in the order I removed them. I also took a couple of photos of where wiring and hoses went so I would have a reference the next day (I took parts of two days to complete the repair).When I removed fasteners (screws, etc), I labeled them as to what part they went with, making re-assembly easier and faster. The most difficult part was re-installing the wire retainers on the door bellows (make sure you use some liquid dish detergent as lubricant). The results were great, I have a like "new"washer now.
Replace both bearings and seal also replace spider gear due to the bearing seal surface damage,also replace drum gasket and door gasket and all shock absorber.The clean up two more time then the repairs did.
The washer drum sounded like a plane taking off in the mudroom.
Started with some resin paper on the floor, some painter’s tape, and a sharpie to keep track of screws and removed parts (painter’s tape to stick hardware to). Set up iPad on dryer and followed every step by step instruction by pausing the video. The instructions were perfect (but would have liked some more close up shots). Installation of new bearings was exactly as demonstrated and truly appreciated the step by step descriptions to put it all back. Hardest part of the repair was replacing the wire ring on the rubble gasket — only step not displayed. Suggestions for future repair videos: 1) how to organized hardware as removed; 2) more close ups; 3) a video showing the problem at the start followed by a video showing post repair. As a visual person, I have spend the past few days watching the spin cycle wondering if there is a wobble or shudder etc… Similar to the feeling of buying a used car…every clunk or shudder gets you worried. Love that I saved $1000 plus taking on the repair.
Pliers, Screw drivers, Socket set, Wrench (Adjustable), Wrench set
1 personfound this instruction helpful.
Was this instruction helpful to you?
Thank you for voting!
Tub bearing and seal failed
Watched a step-by-step video on you tube and ordered parts. I took apart the washer by following the steps in the same video to disassemble. Once apart I took the opportunity to pressure wash the tub and housing then let dry overnight. It takes a minute to get the washer apart then back together, but no part was difficult. No special tools were needed. Before I put the back and top panel on, I hooked a garden hose with a splitter to the supply lines and ran a cycle in the garage just to make sure all connections were nice and tight. No issues. Washer is running like a champ since. As you take the washer apart for this type of repair you basically unhook or remove every single part that could go out. Great opportunity to familiarize yourself with other components for the "next time".
Nutdriver, Pliers, Screw drivers, Socket set, Wrench (Adjustable), Wrench set
1 personfound this instruction helpful.
Was this instruction helpful to you?
Thank you for voting!
Dry bearing noise
I researched the symptom, watched a repair video, ordered the parts: one rear bearing, seal, and gasket. After disassembly found inner bearing to be bad. Ordered inner bearing. Then found the spider or hub shaft corroded, and ordered spider. Finally with all the parts replaced, assembled washer and returned it to service.
Ask our experts a question about this part and we'll get back to you as soon as possible!
3 questions answered by our experts.
< Prev
1
Next >
Sort by:
Search filter:
Clear Filter
Your search term must have 3 or more characters.
Keep searches simple. Use keywords, e.g. "leaking", "pump", "broken" or "fit".
Sorry, we couldn't find any existing answers that matched.Try using some different or simpler keywords, or submit your new question by using the "Ask a Question" button above!
Juan
October 7, 2021
Does the rear bearing come with the seal or is that sold separate. Is there anything else that should be replaced with the bearings.
For model number WM2701HV
Hello Juan, Thank you for the question. This is just the Bearing. We recommend replacing the Second Bearing, Part #: PS3522899 and the Seal/Gasket, Part #: PS3522855 at the same time as this bearing. We hope this helps!
Hello, our washing machine started making a loud noise during the spin cycle and I wanted to know if that’s the right part to fix that and if it’s compatible with my model?
For model number 11047852702
Hello Felicity, thank you for your question. No, that washer tub bearing is not compatible. For your model, we suggest changing the Belt PS11754067 as as the belt wears, it will cause loud noises. We also have a video for your view for installation information. We hope to hear from you soon.
What parts are needed for washing machine spinning loudly?
For model number 79641022900
Hello Sara, thank you for contacting us. Most of the time the loud spinning of the washer is associated with a worn-out bearing, part number PS11711138. We would also recommend checking the rear tub gasket, part number PS3522855, and the rotor assembly, part number PS3522944. Please reach out to customer service if you need help placing an order. Glad to be of help!
The tub bearing supports the spin basket shaft at the back of the washing tub. If your washing machine will not spin, is leaking water, or if there is a loud screeching noise during the wash cycle, there could be an issu...