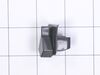
This is an end cap for a dishwasher rack. This part is about 2.5 inches long, is black, and is made of plastic. You may need to replaced this part if it is broken, or if your dishwasher rack continuou...
This OEM-compatible screw is designed for use with many GE dishwashers. Measuring 8-16 HXW and 1/2" in length, this stainless steel screw secures the middle spray arm hub to the upper rack assembly, e...
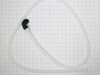
This is replacement door latch for your dishwasher. The door latch is attached to the tub frame, and connects to the door strike to keep your dishwasher door closed during operation. If you have a bro...
This kit includes the lower and middle spray arms. Water is forced through this spray arm by the unit's pump and motor assembly. The force of the water propels the spray arms, spraying water and deter...
Looking to fix your dishwasher and get it back to cleaning your dishes like a champ? Your solution could be the GE Conduit Mid Assembly. This important part, also known as the spray arm manifold, firm...
This diverter valve assembly controls water flow between the upper and lower spray arms in compatible dishwashers, ensuring efficient cleaning during each cycle. Located inside the appliance, it direc...
This drain pump kit is designed to remove dirty water from your dishwasher during and at the end of each wash cycle. If you’re noticing standing water after a cycle or leaks beneath the appliance, the...
The lower rack roller supports the smooth sliding of your dishwasher’s bottom rack. Measuring 1.5 inches in diameter and charcoal-colored, this OEM replacement part is sold individually. Replace all f...
This dishwasher latch strike is a manufacturer-approved replacement part for your appliance. The latch strike is an important component in your dishwasher door assembly, and adds an extra layer of sec...
Ask our experts a question about this model and we'll get back to you as soon as possible!
16 questions answered by our experts.
< Prev
1
2
3
Next >
Sort by:
Search filter:
Clear Filter
Your search term must have 3 or more characters.
Keep searches simple. Use keywords, e.g. "leaking", "pump", "broken" or "fit".
Sorry, we couldn't find any existing answers that matched.Try using some different or simpler keywords, or submit your new question by using the "Ask a Question" button above!
Michelle
November 7, 2023
Our machine is beeping at random times for no reason and then will not have power.
For model number GDF530PGM0WW
Hello Michelle, thank you for contacting us. According to our research, we would recommend checking the user interface control board, part number PS16762507, to fix the issue. We hope this helps!
4 peoplefound this helpful.
Was this helpful?
Thank you for voting!
John
October 27, 2023
How do I access the user interface control board? There are no screws to separate the door.
For model number GDF530PGM0WW
Hello John, thank you for reaching out. We have found some relevant instructions to access the user interface board. These instructions may not be of exact model but will help you with the process. Unplug the appliance and take off the fill line and the drain hose. Remove the screws of the access panel. Pull the access panel out. Disconnect the wiring harness. Open the door of the dishwasher. There are on hinges on both sides. Unhook them to release. Grab the door with both hands and pull it towards you. Remove the screws from the right hinge and the left hinge. Grab the hinge and slide it out. Remove the vent from the back of the door. Now release the front from the back. Grab both the sides and pull away. It will become loose. Grab it and turn it upside down to release. Remove the tabs from the panel and remove the panel. Remove the wire harness and screws and remove the User interface board. Follow the same steps backward to install it again. We hope this information helps!
2 peoplefound this helpful.
Was this helpful?
Thank you for voting!
Michael
May 21, 2024
how do I check door lock switch
For model number GDF530PGM0WW
Hi Michael, thank you for your inquiry. In order to test the door switch for continuity. Begin by setting your ohmmeter to measure resistance at a scale of Rx1. Touch one meter lead to the com terminal and the other lead to the n.o. terminal. Do not push in on the actuator. Your meter should give a reading of infinity, meaning the circuit is open, and there is no continuity. Without moving the meter's leads, press down on the actuator until you hear a click. With the click of the actuator, the meter should produce a resistance reading of zero ohms. This means the circuit is closed and continuity is present. We hope this information helps!
1 personfound this helpful.
Was this helpful?
Thank you for voting!
Deborah
December 26, 2022
There's a vent on the left inside side of the dishwasher wall next to the sink. it's leaking water in the bottom of the dishwasher and filling with water what do I need to do to stop it from filling up and spelling out on the floor.
For model number GDF530PGM0WW
Hello Deborah, thank you for your question. Your unit may be taking in more water than it should and not draining properly. Check the Drain pump PS12582714 or the Flood Float PS11771980. Or, it may be the Lower door seal PS11700870. We hope this helps.
Where can i get new wire harnesses for this model of dishwasher? I need both sets
For model number GDF530PGM0WW
Hi Tim,
Thank you for your question. There are currently 4 wire harnesses available for this model. The part number listed under your model number for the jumper harness assembly is PS12170953. The part number for the DC harness assembly is PS12582718. The part number for the IU door harness assembly is PS12730508. The part number for the AC harness assembly is PS12716569. If you would like to place an order for them, you may order them either online or by calling our customer service line and anyone will be happy to assist you. We hope this helps! If you have any questions, please let us know.
Was this helpful?
Thank you for voting!
< Prev
1
2
3
Next >
✖
Ask a Question
Ask our experts a question on this model and we'll respond as soon as we can.
Took off the kickplate, diconnected the wires and removed the whole door by lifting straight up, removing spring wires from hinges. Once door is disconnected from the machine, removed one hinge by removing bolt. Slid gasket into place, secured hinge back in place, then reconnected wires at bottom, replaced hinge spring wires and slid door back down onto hinges. Now that we know how to do it, could do it in 15 min to half hour.
This didn't work out well. At the beginning of September the control panel in the door started to work erratically, the lighted buttons did not light up as expected. I ordered a replacement board and installed it. CONFIGURED UI SERVICE CONTROL Part #: PS16618944 This did not help, so I ordered another control board and installed it. CONFIGURED SERVICE MACHINE CONTROL BOARD Part #: PS16226072. This did not help. This control board has a small orange fuse that looks like an old fashioned transistor. it was fine, as was the fuse on the previous control board. There were two things about the Control boards that might help someone figure out what went wrong. When I took out the original control board, there was evidence of component overheating. When I installed the new control board there was a green light that was blinking. I had hoped to complete this repair, but we have been without a dishwasher for over a month, so I bought a new one. (I am a competent Instrumentation and Controls technician) It could be that there is a bigger issue here; a major component failure. If anyone has some suggestions to try, I would like to repair the machine and sell it as a used appliance.
this was ordered 4-9-21 and I have yet to receive it. Its difficult to explain the installation when you haven't received the main part. I paid for this but you have not shipped it. Very poor customer service.